Salvaging a broken KVM switch using a Teensy device
...or: what to do on new year's eve afternoon?
In the days after Christmas of 2023 I finally managed to reorganize my home office setup into a decent workplace environment. This in itself might be worth a blog post. While doing this, something really bad happened: I broke one of my KVM switches by accident. My working environment employs two KVM switches with each connected to one monitor, and a total of 6 computers that are somehow connected to these KVMs. One KVM switch, which is not the one I destroyed, is an 8 port switch with analog video signal (i.e. VGA) which all of those 6 machines are using for analog video output. This KVM is connected to one of my two workplace monitors via VGA. The other one (the one I broke), a 4 port switch, uses digital video (i.e. DVI) and is connected to the other monitor via DVI. So only the four most decent of those 6 computers are connected to this KVM switch, so these four out of six computers can be run in a multimonitor setup and the other two ones, which are rarely used and sort of vintage, are run in a single monitor setup using only analog video output via the 8 port switch.
So, what exactly is a KVM switch?
In case you don't know: KVM is an acronym for "Keyboard-Video-Mouse". A KVM switch is a device that allows to connect multiple computers with their video output and their keyboard and mouse input to exactly one monitor, keyboard and mouse. For a dual monitor setup, you need two KVM switches with one of them switching keyboard and mouse in addition to the video signal. KVM switches allow you to switch channels or ports so different computers attached to the switch can be made the ones whose video output is shown on the monitor and that receive keyboard or mouse input.
What has happened?
For some reason, I virtually managed to physically destroy the push buttons at the front of the 4 port KVM. Maybe the KVM was leaning with the front side turned down and too much pressure broke the push buttons. The next image shows how this KVM looks like:
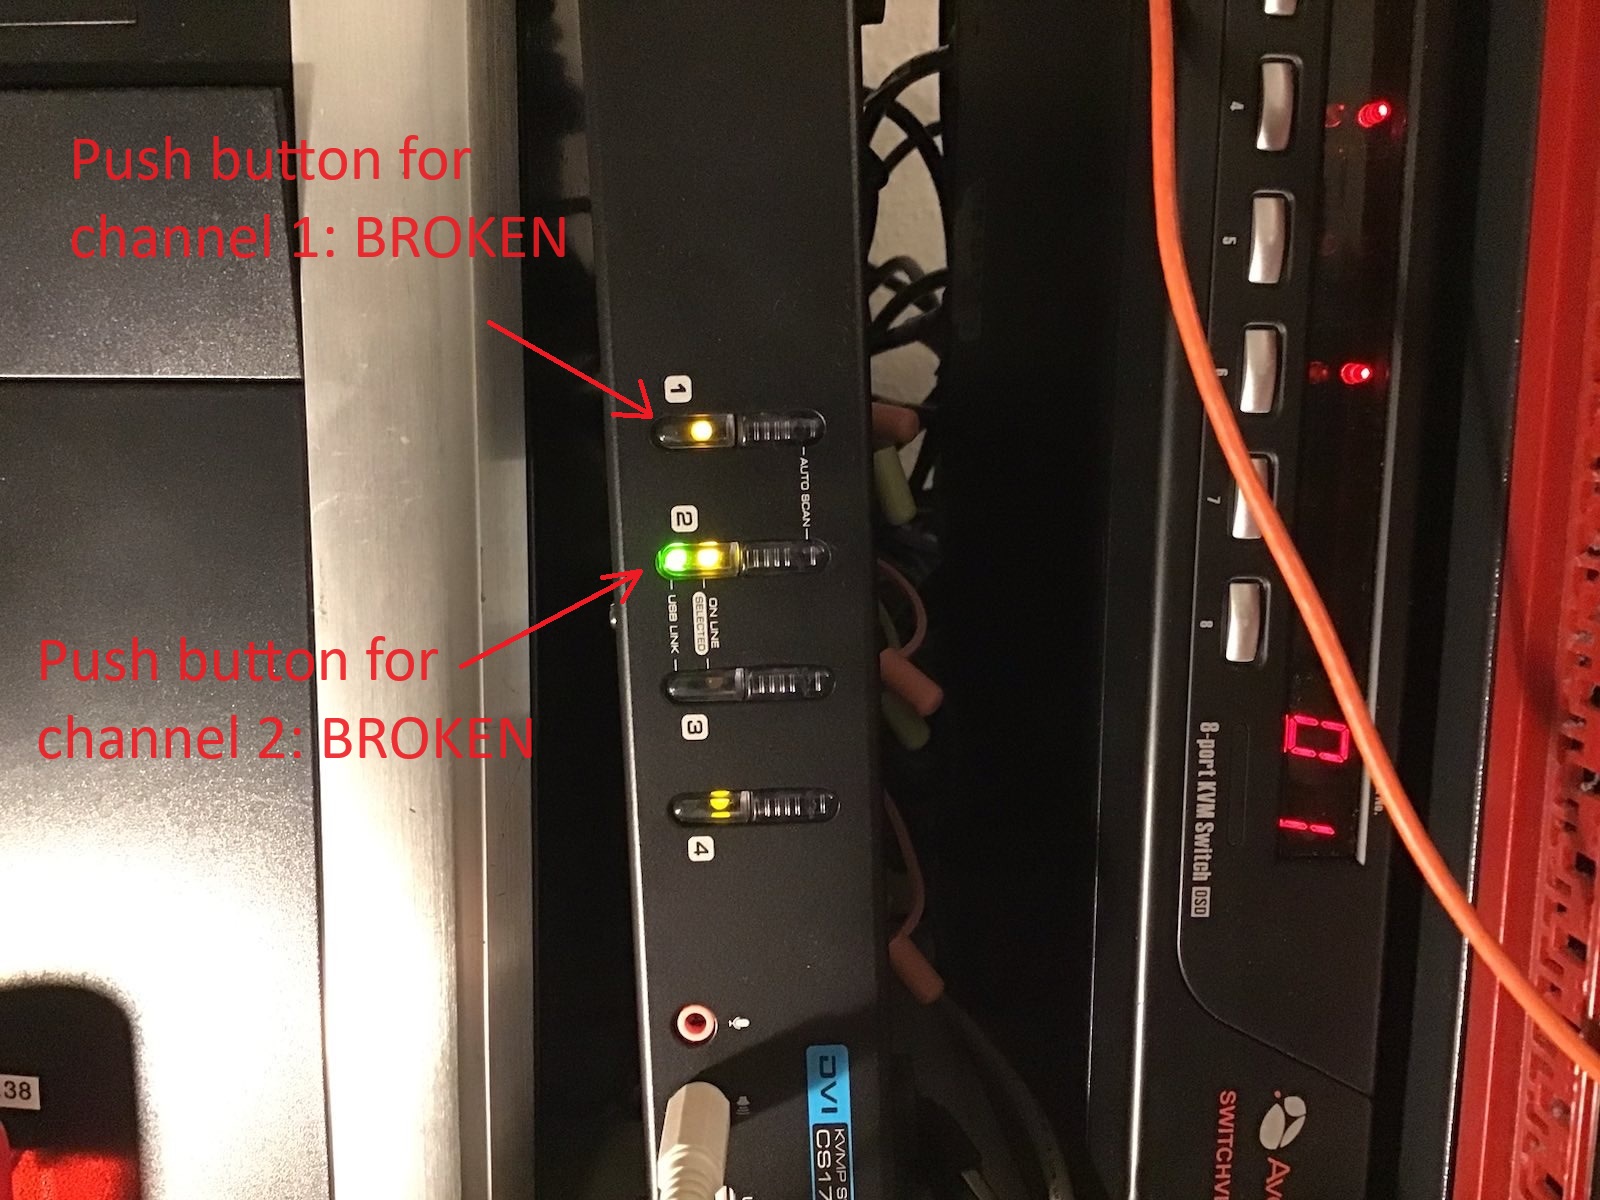
So what can you do, if the push buttons of a KVM switch do not work anymore? I opened the case of the KVM and tried the push buttons without the case and soon realized that channels cannot be switched anymore using them, at least the push buttons for channel 1 and channel 2 were dead as nails. I reassembled the KVM and began to think: "Isn't there always a keyboard key combination that switches channels from a keyboard?". And yes Virginia, there is one for this KVM switch: You need to press Scroll Lock twice, followed by the enter key. So this shouldn't be a problem, right? Just hit Scroll Lock twice followed by the enter key once on the keyboard. Nope: My keyboard for all of those 6 machines is not connected to the 4 port switch, but instead to the 8 port switch, because otherwise the two vintage computers enjoy no keyboard support! So I quickly attached a small size USB keyboard to the 4 port switch and tried if I can use this in the interim for switching ports on the 4 port switch - and it worked. The next image shows this small keyboard hidden under one of the monitors:
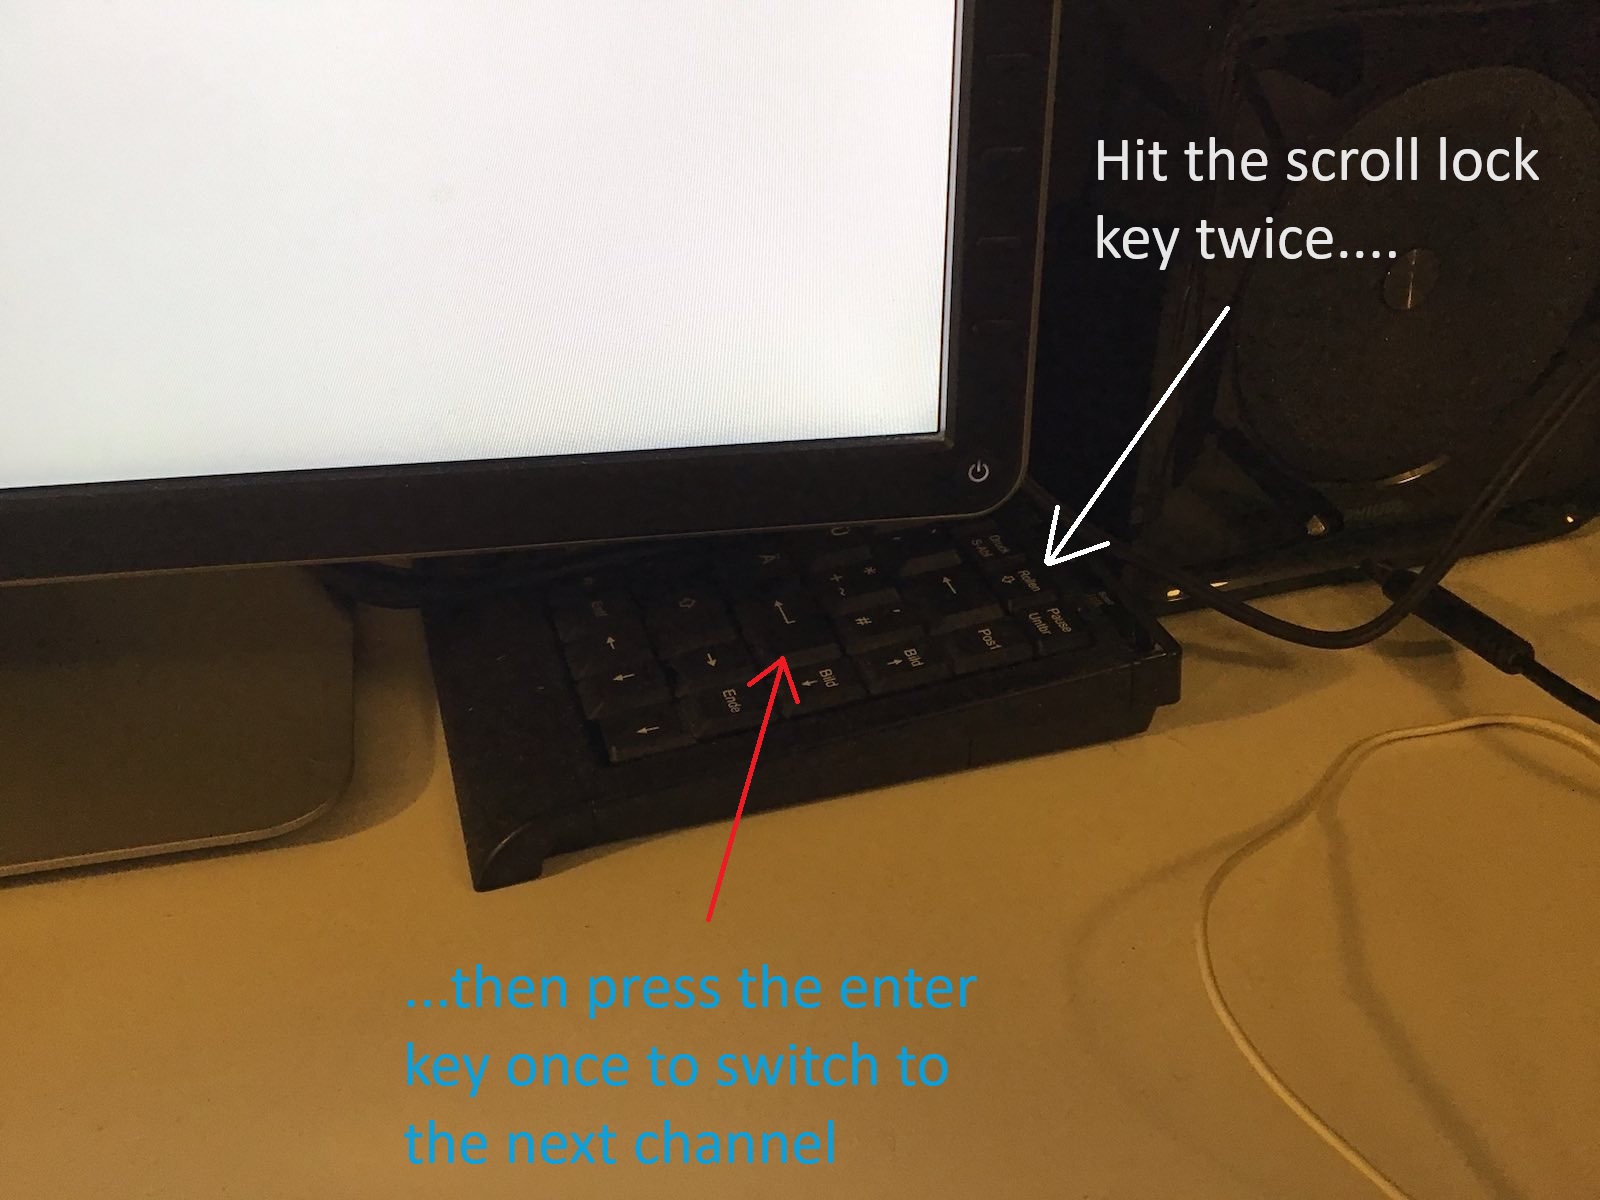
While this works, it is really cumbersome to always exactly hit scroll lock twice, followed by a single press of the enter key and it admittedly looks really ugly. A better solution had to be found...
Hang on, aren't there these Teensy devices and the foot pedals somewhere in a long forgotten box in a long forgotten drawer?
I remembered that something like 12 years ago or so, I bought a couple of Teensy devices and two foot pedals. At that time I used my first bunch of tablet devices running Windows 8 which I thought could make up good digital replacements for paper sheet music that I could use during rehearsals or gigs to demonstrate my uniqueness and technical avantgarde. The problem with having music sheet pages displayed on a tablet device while playing is this: You cannot switch forth and back between pages easily while using both hands to play your instrument, so my idea back then was to implement a USB keyboard with a Teensy device and two foot pedals which would send a Page-Up keystroke or a Page-Down keystroke when pressed. For some reason this project never came to life and I have long since disbanded the stupid idea of playing music from a computer screen. Paper based music sheets are so much more flexible after all.
What is a teensy device?
This is what such a teensy device looks like, in my case it is a quite out-of-date Teensy 2.0 device:

The Teensy has a mini USB port that is used both for programming it via the Arduino IDE and for its operational use when it is programmed to act as an HID (human input) device, namely as a USB keyboard. First of all I quickly soldered two pin header rows to the Teensy board in order to plug it into a breadboard, adding a 10 kOhm pull-up resistor and the foot pedal switch. This is how the breadboard design looks like:
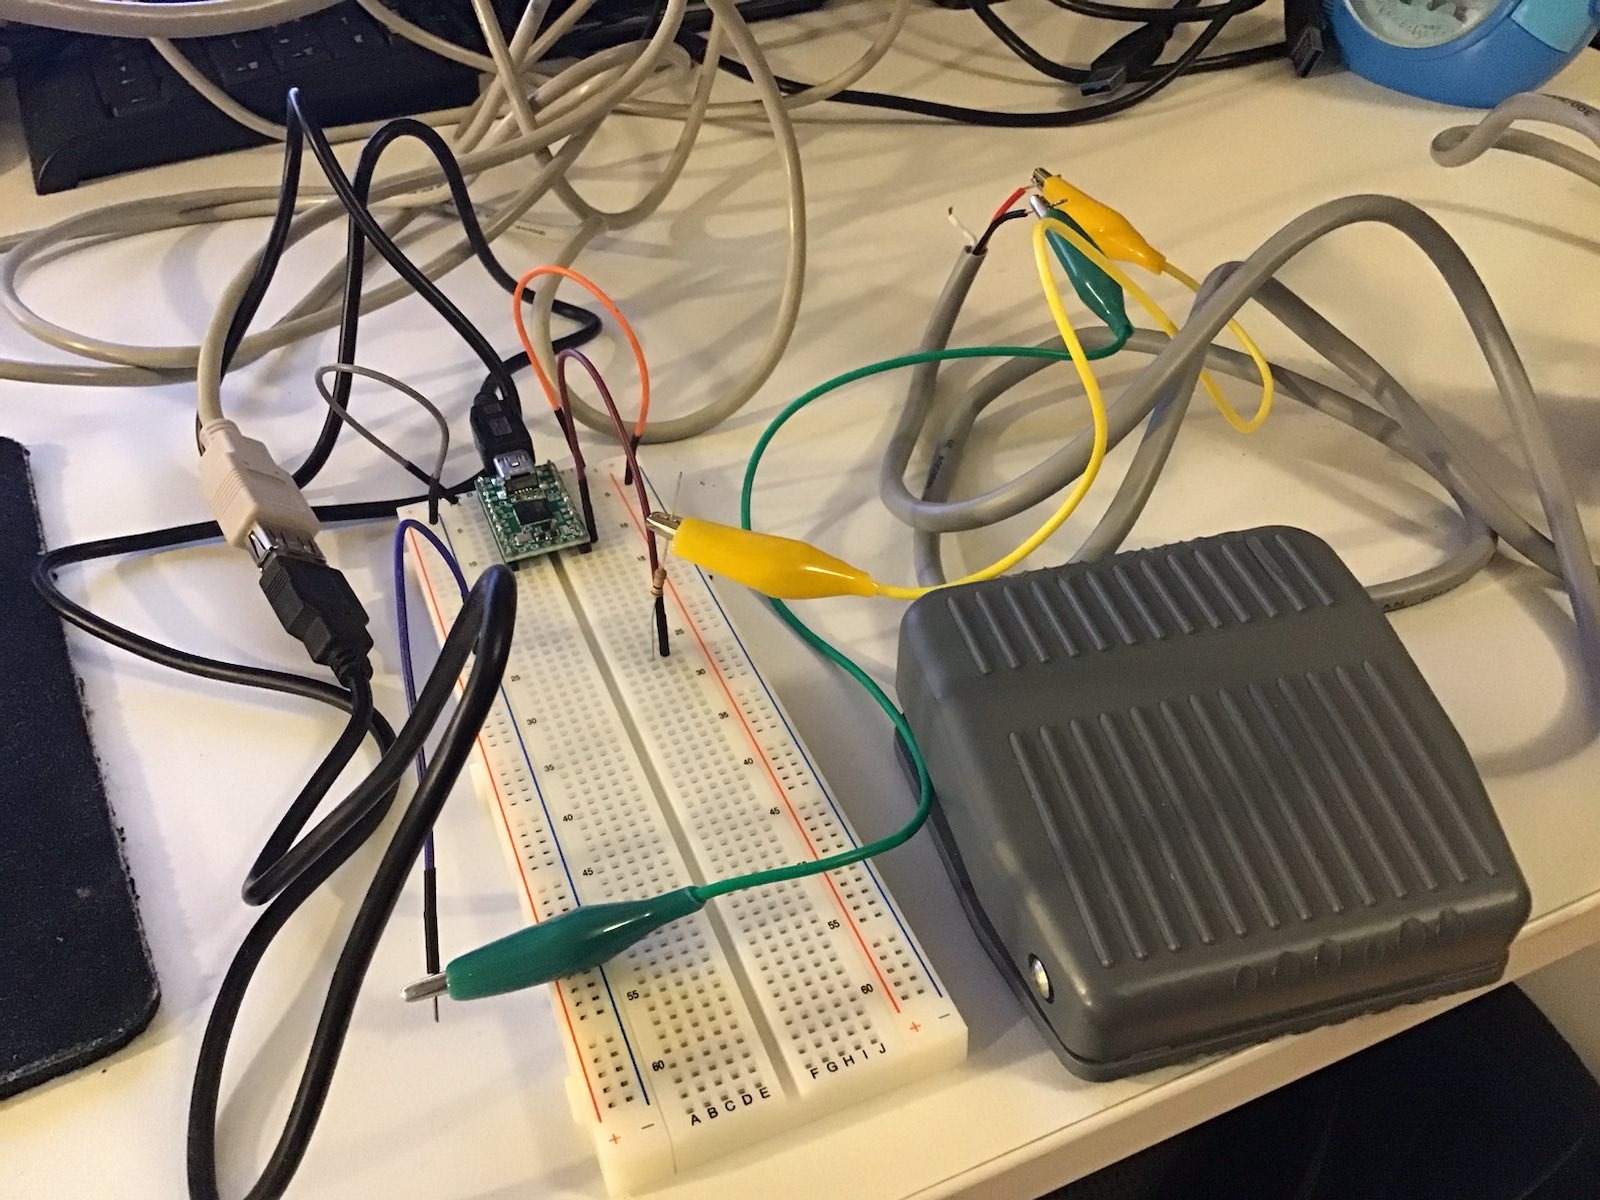
You can see that heavy-duty foot pedal switch to the right of the breadboard. The code I used to program the Teensy is pretty darn simple:
}
The foot pedal switch has its contacts closed when in its normal position, but opens the contact, if the pedal is pressed. So all the code does is detect the event when PIN_D7 is raised from GND (0V) to +5v DC via the 10 kOhm pull-up resistor and then it executes the function PressScrollLock twice and the function PressEnter once. Both functions do what their names suggest: They press and release their respective keyboard key with an arbitrary delay of 100ms inbetween. DISCLAIMER: I know I could optimize this code, it is not DRY, but that was not the point of this experiment.
Getting into production mode
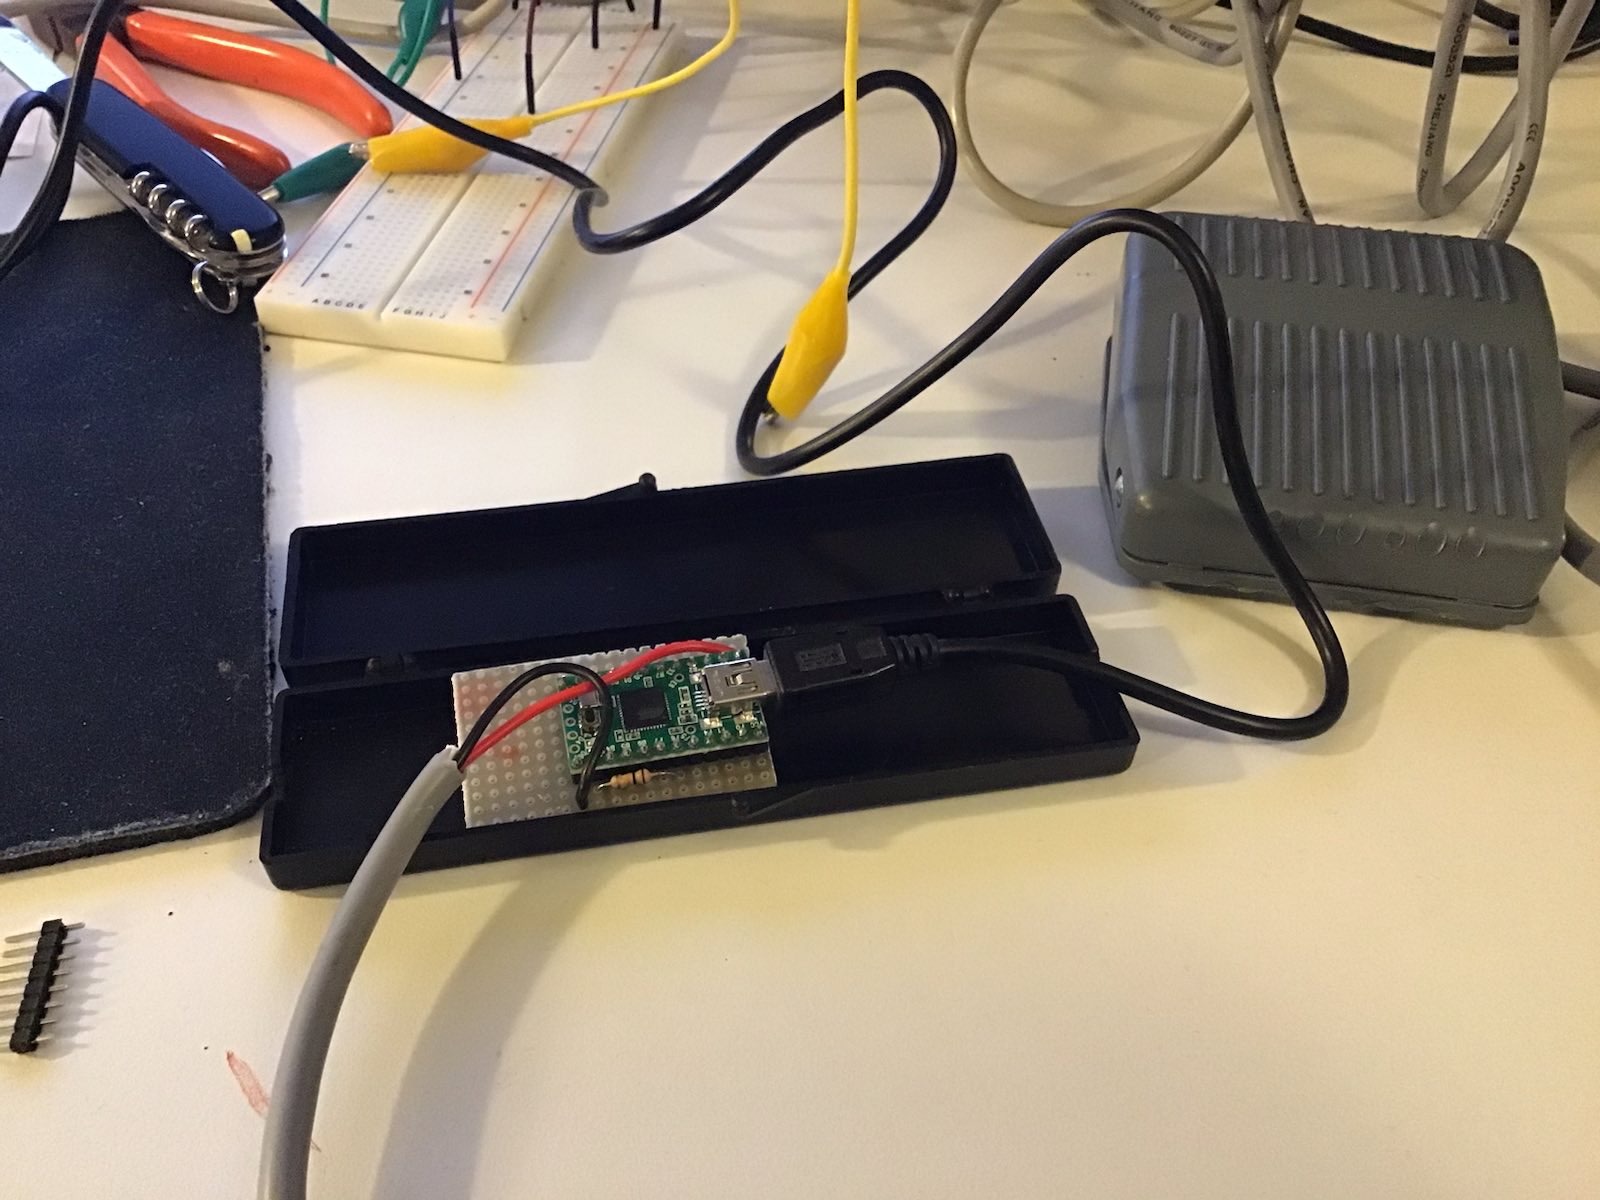
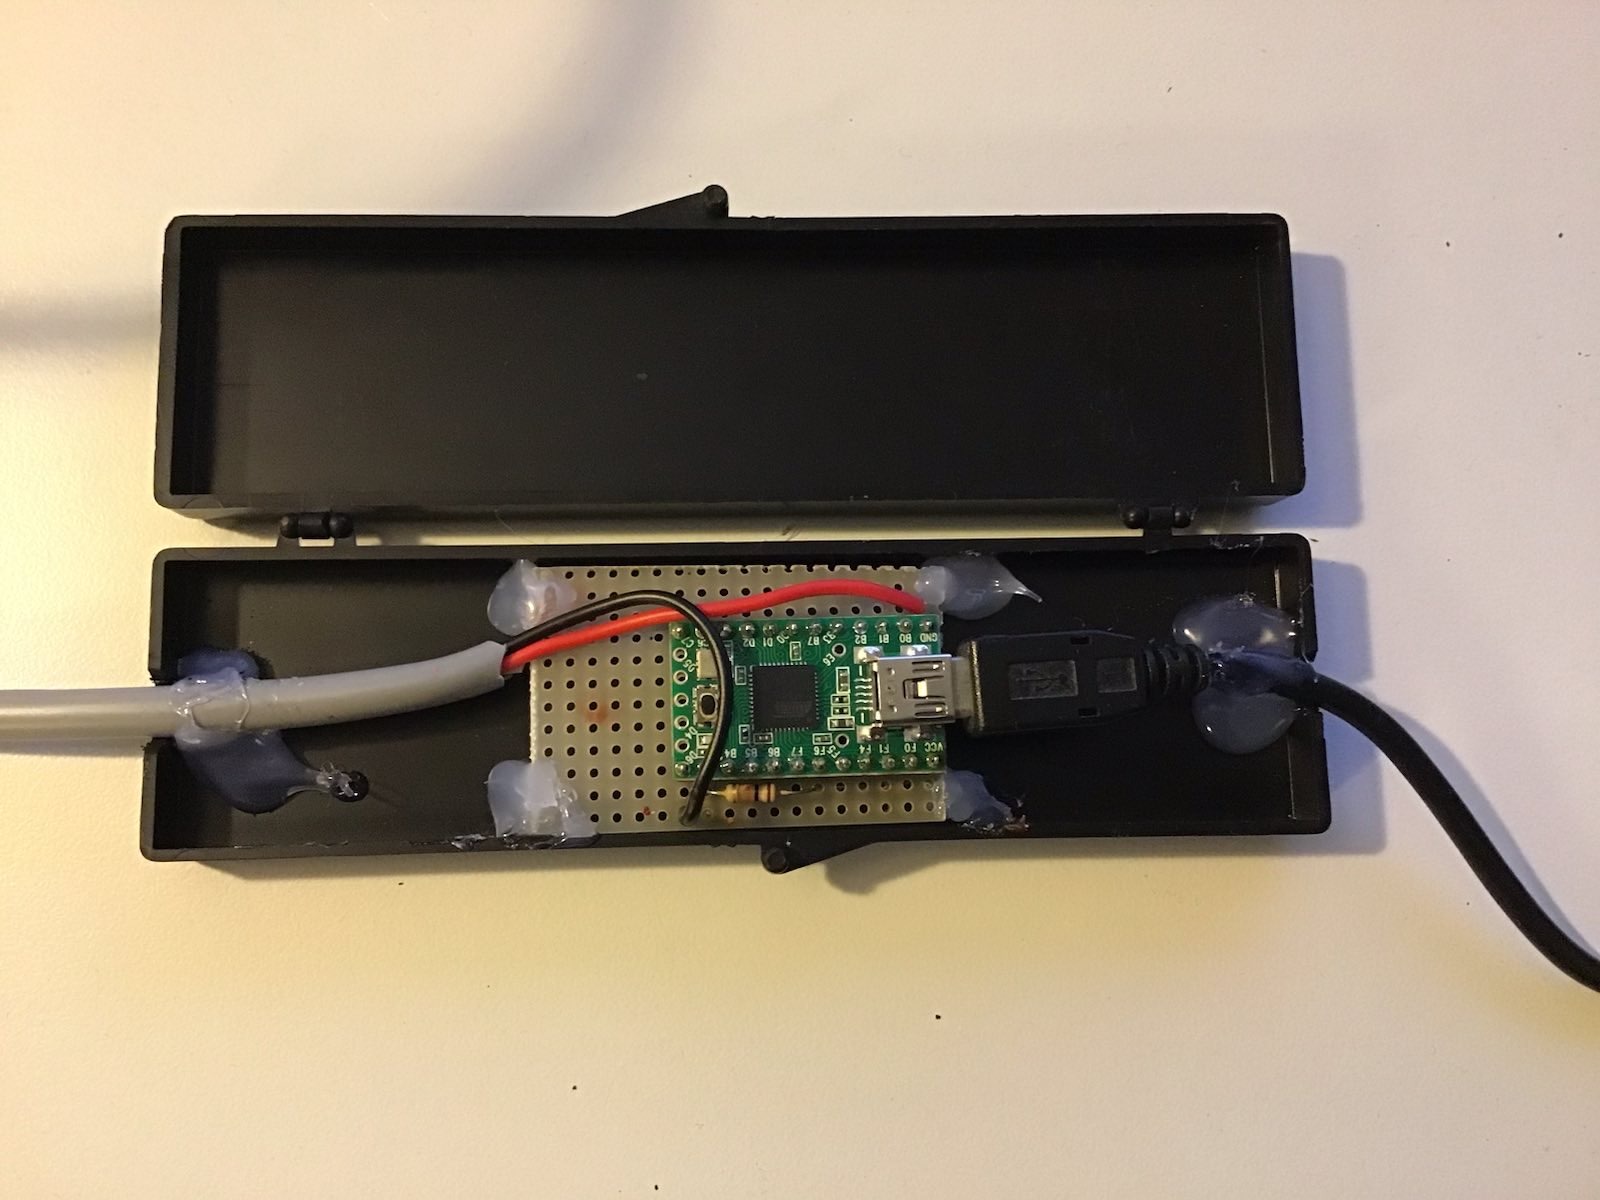
Having this breadboard design was fine and after attaching it to the KVM it actually worked instantly, I could switch KVM channels via the foot pedal switch, hooray! But having a breadboard design on my desk was none the better than the interim approach using the small USB keyboard. So I quickly soldered the Teensy with its pin header rows and the pull-up resistor onto a somewhat larger hole-matrix board along with the connectors to the foot pedal. I chose an old DRAM package plastics case where everything would fit in quite neatly:
Some glueing later this piece of hardware looks like this:
Looks quite nice, doesn't it? But it only gets better: The complete device with the casing closed with the help of two wire straps looks like this:
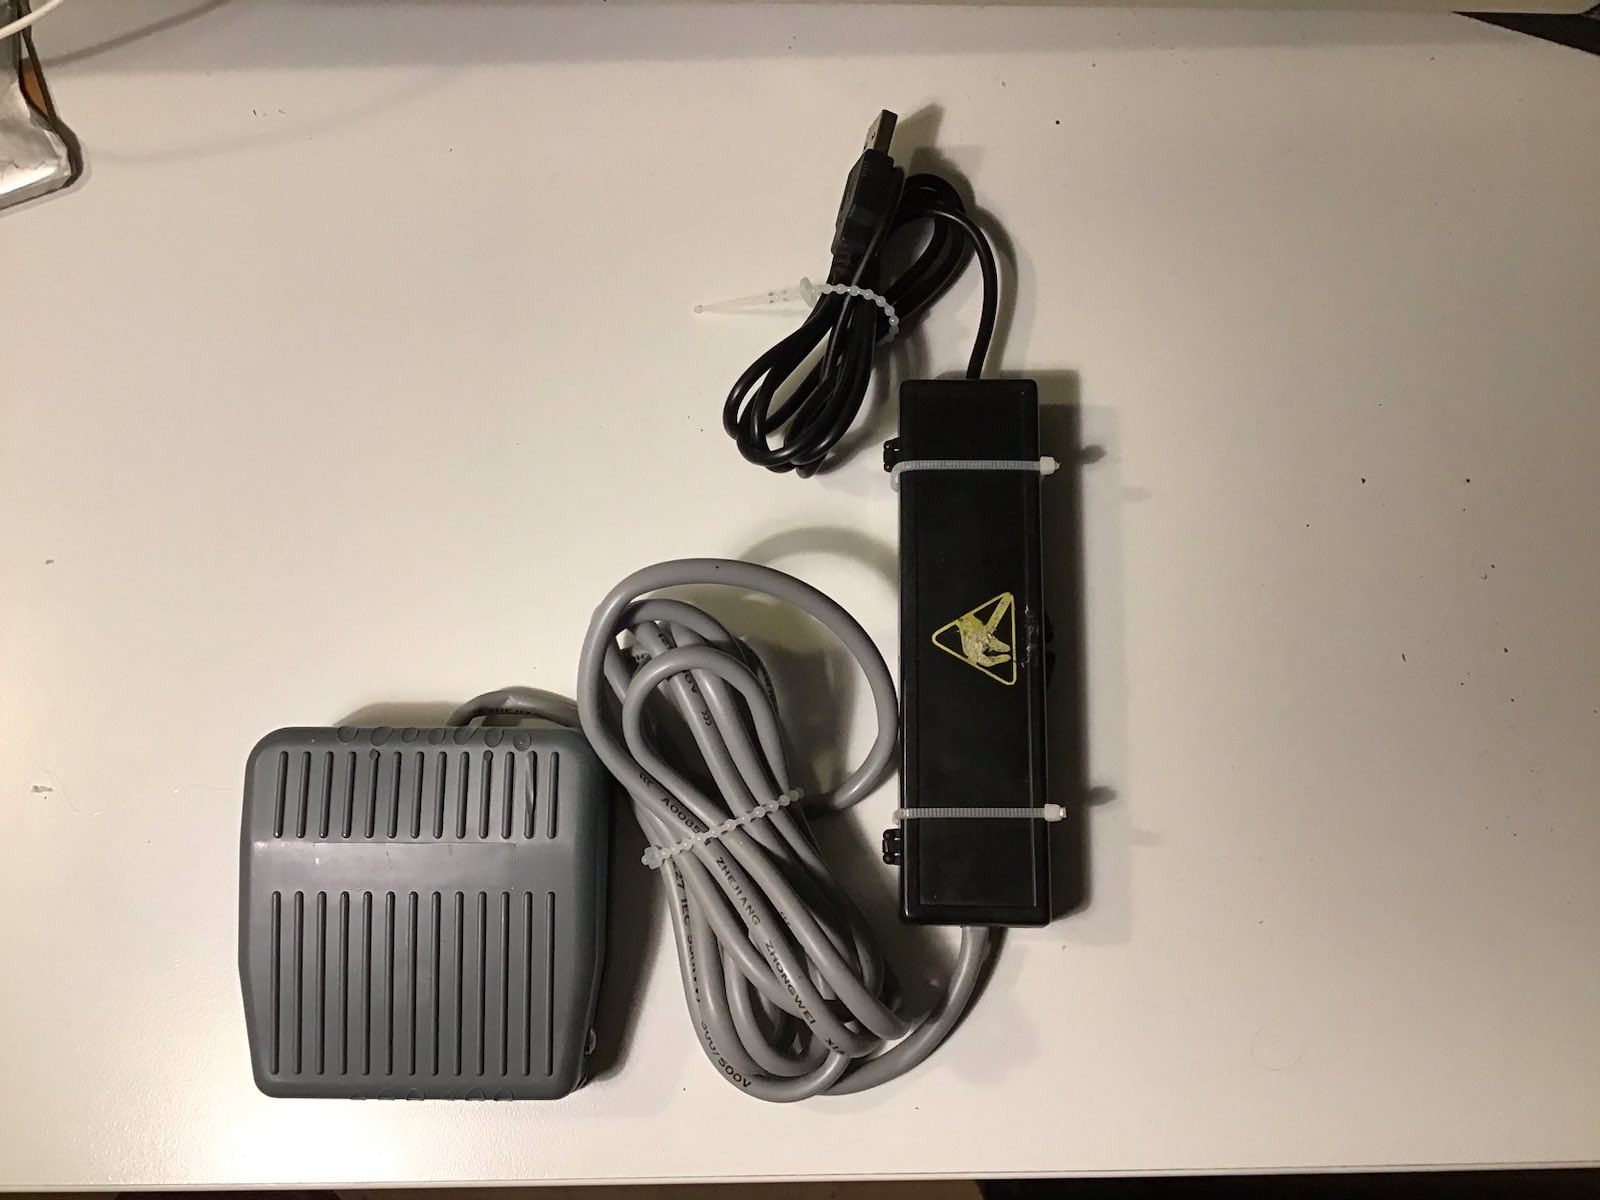
Doesn't that look almost... professional?
And as a final picture this one: it shows how the switch is sitting on my desk at the same position as the small USB keyboard before. Definitely an improvement and worth spending an otherwise boring new year eve's afternoon.
