Pet project: Creating a fully automated Youtube fishtank livestream using a Raspberry Pi (Part I)
Since now a bit more than 2 years my home has a number of pets that make life a bit more colorful: They dwell in a decent sized fishtank with a capacity of 240l. And almost as long I had the crazy idea of being able to stream live video from this fishtank to the rest of the world. This is the first part of a multi-part series of blog posts that describe my setup, including the requirements list and the resulting hardware and software solution. So if you want to build your own version of a fully automated YouTube livestreaming solution or if you are just brave enough or curious how this can be done, read on:
My initial idea was to finally replace my DSL-Lite internet connection with a business connection and an associated public IP address that I could use to run a world-accessible streaming server, but that would have required a demilitarized zone and thus at least two routers and complicated setup so I abandoned this idea, but only after months of thinking about it.
Tired of wasting time and thoughts on an impractical solution, I turned my attention to the YouTube live streaming services, and since I have my own (mostly irrelevant for most purposes) YouTube channel already since 2007, I wanted to find out if this could be a suitable platform for my requirements. It was the beginning of an interesting journey.
My requirements for fishtank livestreaming were the following:
- it should be affordable, something along the lines of 100 Euros should not be exceeded for all of the equipment
- it should run with minimum power consumption, as it is supposed to run headless and unattended in a 24/7/365 fashion
- the camera that records the video stream should not be mounted at the outside of the fishtank, a waterproof camera that can be fully submerged in the fishtank is an absolute requirement
- it should be running fully automated, no manual intervention should be required for a live stream to be broadcast
- the live stream should not negatively impact the performance of my internet connection which only has an upstream rate of ~11 Mbit/s
Affordability
Two pieces of hardware are required at the very least for a livestreaming solution: A computer with decent encoding capabilities and a camera. Since I have a Raspberry Pi 4 running my private subversion repository, this computer became the natural choice as the encoding platform. However, this choice introduced a new requirement for the overall solution:
- The Pi should still be able to fulfill its role as my subversion server, overburdening its 4 cores with video encoding is not acceptable
The Raspberry Pi 4 model is currently listed with a price of ~38 Euros for the 1GB variant, so this should be well within our budget. My Raspberry Pi is an 8GB model, but I am pretty sure the whole shebang also runs with the 1GB variant, memory is not a bottleneck for the problem at hand. In addition, a power supply for the Pi is needed, the official power supply from the Raspberry Pi Foundation has a price of ~8 Euros. Add a decent case for the Pi to it which is at about 5 to 10 Euros, so we are at 56 Euros in total now. The only solution for a camera that is waterproof remains to be an endoscope camera. Endoscope cameras are readily available on the internet for small money, prices are starting at around 15 Euros. But beware: Most endoscope cameras are only rated with IP67 (see here for IP codes). That means they are dustproof, but not fully waterproof. What you really want is an endoscope rated with IP68 (dustproof and waterproof). Luckily, I was able to find an endoscope with the brand name "Lychee Wifi Endoscope Inspection Camera" on Amazon which purportedly is IP68 (keep your fingers crossed!). I wasn't so sure if this piece of hardware would be suitable for my purposes, because it actually is a Wifi based endoscope solution, but it was the only affordable IP68 endoscope I could find: ~35 Euros - so I purchased it. To my surprise this piece of gear is actually a USB endoscope with an additional small box that implements a Wifi access point and where the endoscope's USB connection is supposed to be plugged in. Instead of using this box I quickly attached the endoscope's USB connector to my windows machine on my desk and it not only was immediately recognized as a hardware camera, it even produced live video! But all of this would not be worth a penny if the Raspbian distribution running on my Pi would not be able to use this camera. To my great satisfaction, it worked like a charm.
The following picture shows the endoscope mounted with a wirestrap to a suction cup inside the fishtank:
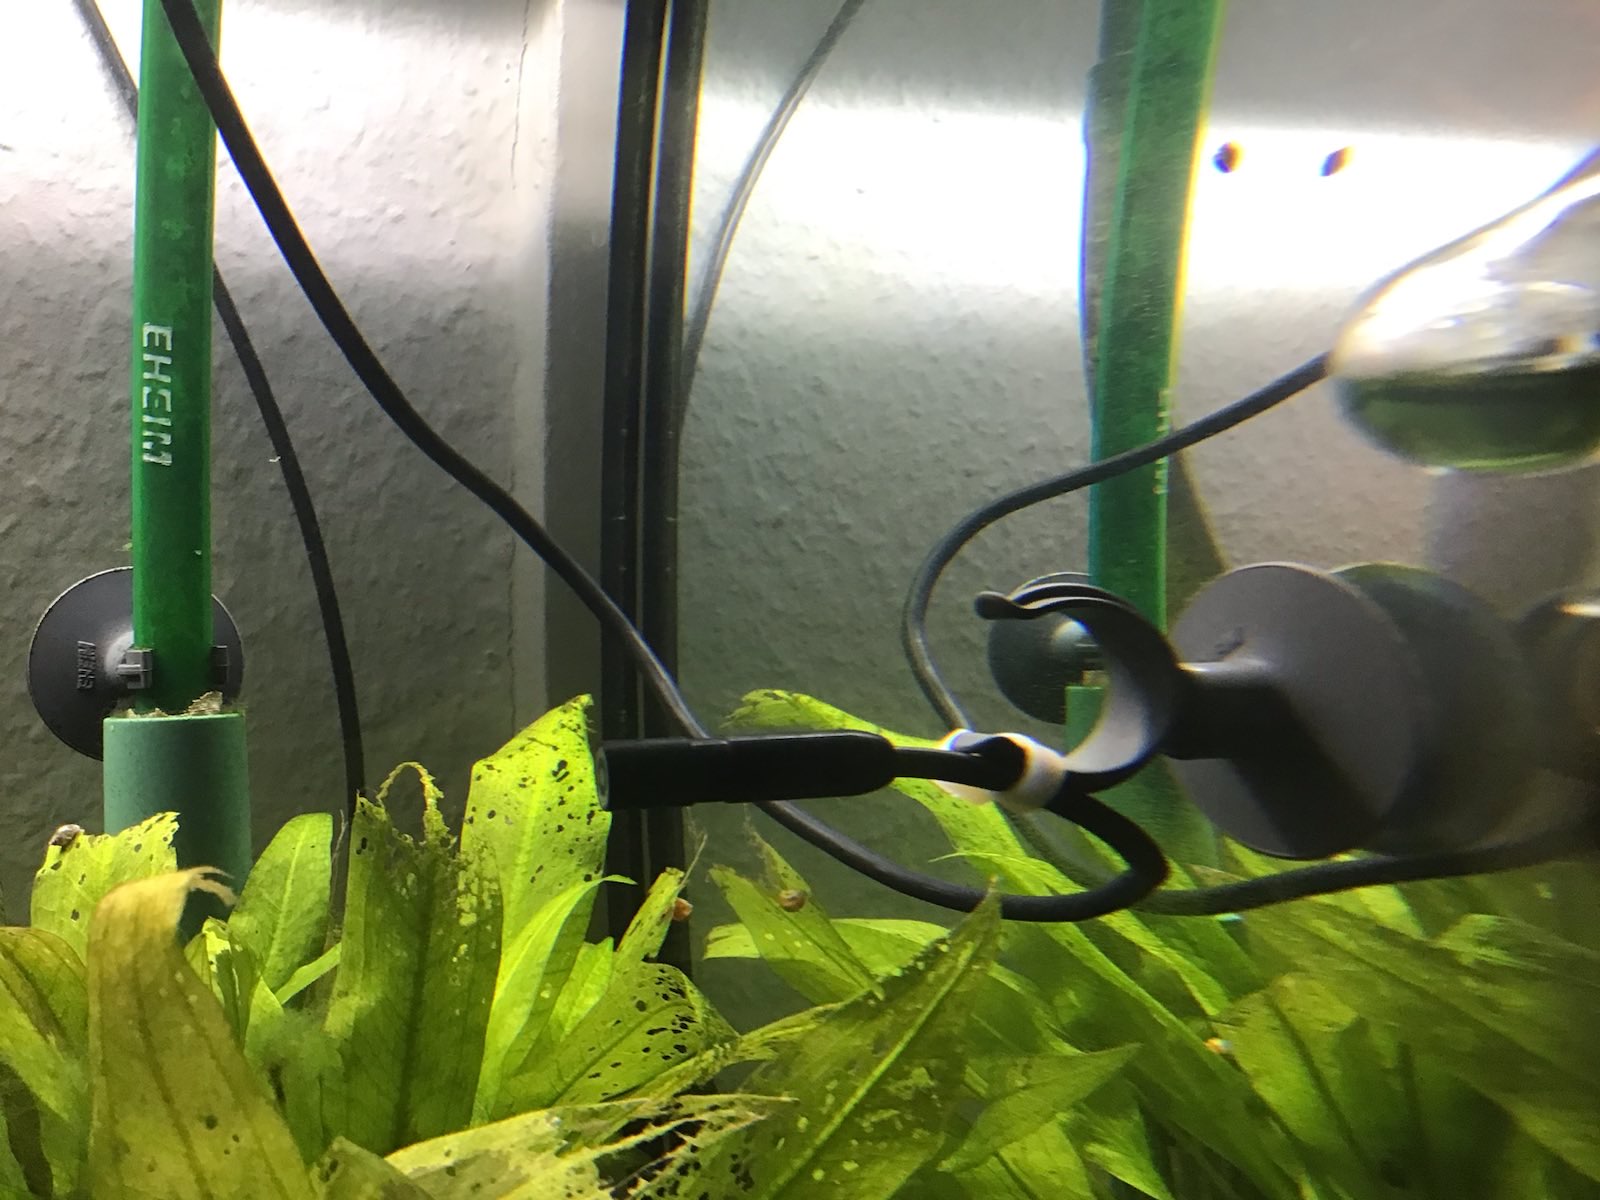
We are now at 91 Euros of investment in hardware, not included shipping and packaging costs, but this is all well around the envisioned maximum budget of 100 Euros. If you want to make life easier for you and if your YouTube streaming Pi is located nearby a switch or a router as in my case, you might want to consider adding another 2 Euros to the overall cost for a network cable, otherwise you will have to configure the Pi's Wifi connection to connect to your home router.
Power consumption
The Raspberry Pi 4 has an idle power consumption of 3W. Under maximum load with all cores at 100%, it can draw up to 7W roughly. Since my plans are anyway to not overburden my Pi, as it still has to serve other useful purposes, I would guess that the average power consumption of it during the hours it is streaming to YouTube is something around 5W. It just makes no sense to stream a dark fishtank at night to YouTube, so during the 12h per day that the Pi is not streaming, we have idle power consumption. I think it does not get much better than that.
Conclusion
This is the first part of a series of blog posts on how to build your own fully automated YouTube live streaming solution. In the next installment I will focus on the software side of the project which turned out to be the most time-intensive part of my tiny little pet project. What we can see at this point, however, is that hardware cost/availability/compatibility/feasibility is definitely not going to be the party pooper.
Trackback address for this post
No feedback yet
Comments are closed for this post.