In order to reproduce what I did, you need the following BOM:
- An EHEIM Y-adapter for the EHEIM classidLED series (EHEIM part # 7421078).
- A multimeter (not strictly necessary, unless EHEIM changes the assignment of cord colors within their Y-adapter), you also might be able to borrow this from your friendly nerd around the corner.
- A crimping tool and 4 fork cable lugs, you might be able to borrow the crimping tool from somebody else. The cable lugs should be available at your local hardware store.
- A wire stripper and a wire cutter, you might also be able to borrow this, while I also think that a wire cutter should be in everyone's tool chest.
- A multiple socket that can be mounted with screws.
- A TC420 LED controller.
- Two cable clamps for 4-5 mm wire.
- A couple of heat shrinking tubes for small sizes (2 - 5mm diameter).
- A wooden board of size 60cm x 20cm x 18mm where all ingredients of the solution are mounted.
Output
connector
|
Power | EHEIM classicLED
Supply | LED stripe
| ______________________
____ cord ↓ cord | | | | | |
|__|--------= ≡-----------------| | | | | |
|| 24V DC ↑ | | | | | |
| ̅ ̅ ̅ ̅ ̅ ̅ ̅ ̅ ̅ ̅ ̅
230V AC~ |
Input
connector
Luckily, there is a pair of connectors between this lighting system's power supply and the LED stripe itself, which is the exact place where we can plug in the TC420 controller. On this lovely piece of ASCII art of mine I have denoted the output connector at the cord that comes from the power supply with the = symbol and the input connector at the cord that is connected to the actual LED stripe with ≡. For normal operation of the lighting system, these two connectors have to be stuck together and electrical current (voltage: 24V DC) can flow through the LED stripe. Now we can take a look at the Y-adapter that is normally used in order to operate two of these LED stripes with one power supply. Following my convention with the two different symbols = and ≡ denoting the output and the input connectors, the schematic for the Y-adapter looks like this:
Output
connector 1
|
|
↓
Output 1
------------------=
Input /
≡-----------------
\
↑ ------------------=
| Output 2
| ↑
Input |
connector |
Output
connector 2
For the operation of two LED stripes with one power supply using this cable, the input connector must be connected to the power supply's output connector and the two LED stripes must be connected with their input connectors to the two output connectors of this cable. But this is not what we actually want. Instead, we want to cut this Y-adapter into two pieces and the following schematic shows where we apply these cuts, the places where we apply them are marked with a red ⫽ symbol:
Output
connector 1
|
|
↓
Output 1
-⫽----------------=
Input /
≡-----------------
\
↑ ----------------⫽-=
| Output 2
| ↑
Input |
connector |
Output
connector 2
If you cut the Y-adapter, you will notice that inside the black isolation there are two cables, one with a brown isolation and one with a blue isolation. Electrical current in an electrical circuit always means that electrons flow into the circuit at one contact of the circuit and leave them at another contact, hence there are actually two cables enclosed in the black isolation. Wow, I can hardly believe, I had to write this.... The first cut at the cable that is connected to the output 1 connector will leave a small stub of unneeded cable right after the junction point. It is a good idea to leave something like 1 cm for this stub so you can remove the black isolation from this stub and individually isolate the two stubs with a piece of heat shrinking tube (2 mm diameter) that is a bit longer than the cable stubs, so the tiny bit of litz wire that can be seen at each cable end is fully enclosed by its piece of heat shrinking tube. This is so you never get into trouble from these stubs accidentally creating a short circuit. After having isolated the black and the brown cable stub, you can enclose both stubs and the cable that comes out of the former junction point with a wider piece of heat shrinking tube (4-5 mm diameter) and a lenght of about 2 cm, so everything looks nice and professional. I have to confess that I have no idea how shrinking tube is shrunk with a professional instrument, I have always used a lighter in the rare cases I had to do this up to now. Be careful when doing this with a lighter in order to not scorch the shrinking tube or the cables. The second cut will remove Output connector 2 which we can just throw away.
Now that we have two pieces of cable, one with an input connector and one with an output connector, we will dismantle their loose ends using the wire stripper. First we will carefully remove the black isolation using a knife for a lenght of about 2 cm and then we will dismantle the brown and the blue cables so we have a lenght of the litz wire of around 0.5 to 1 cm for each pair of wires at each cable.
Now these 4 pieces of unisolated litz wire have to be crimped into four fork cable lugs in order for them to be safely attached to the controller later. I am pretty sure YouTube has plenty of tutorials on how to use a crimping tool with wire cables and cable lugs, in case you need one. For me it was pretty self-explaining how to use this tool.
At this point we are ready to assemble everything together, but we need to check for the polarity of the two cables, for this you either need a multimeter (set it to 200V DC as the maximum voltage as the power supply gives us 24V DC) or you can hope that the polarity is the same as with my cables: the brown cable is positive voltage and the blue cable is negative voltage.
I wanted everything to be positioned inside the fishtank's floor cupboard and so came the ingenious idea of mine to mount everything onto a wooden board which itself will be hinged into two hooks that I screwed into the dividing wall of the floor cupboard. So at the shorter side of the board I mounted two eyelets at its backside that can be used to hinge the board into the two hooks.
The next figure shows how the wooden board looks like after I had mounted everything onto it. Click into the image for a higher resolution image version in a separate browser window.
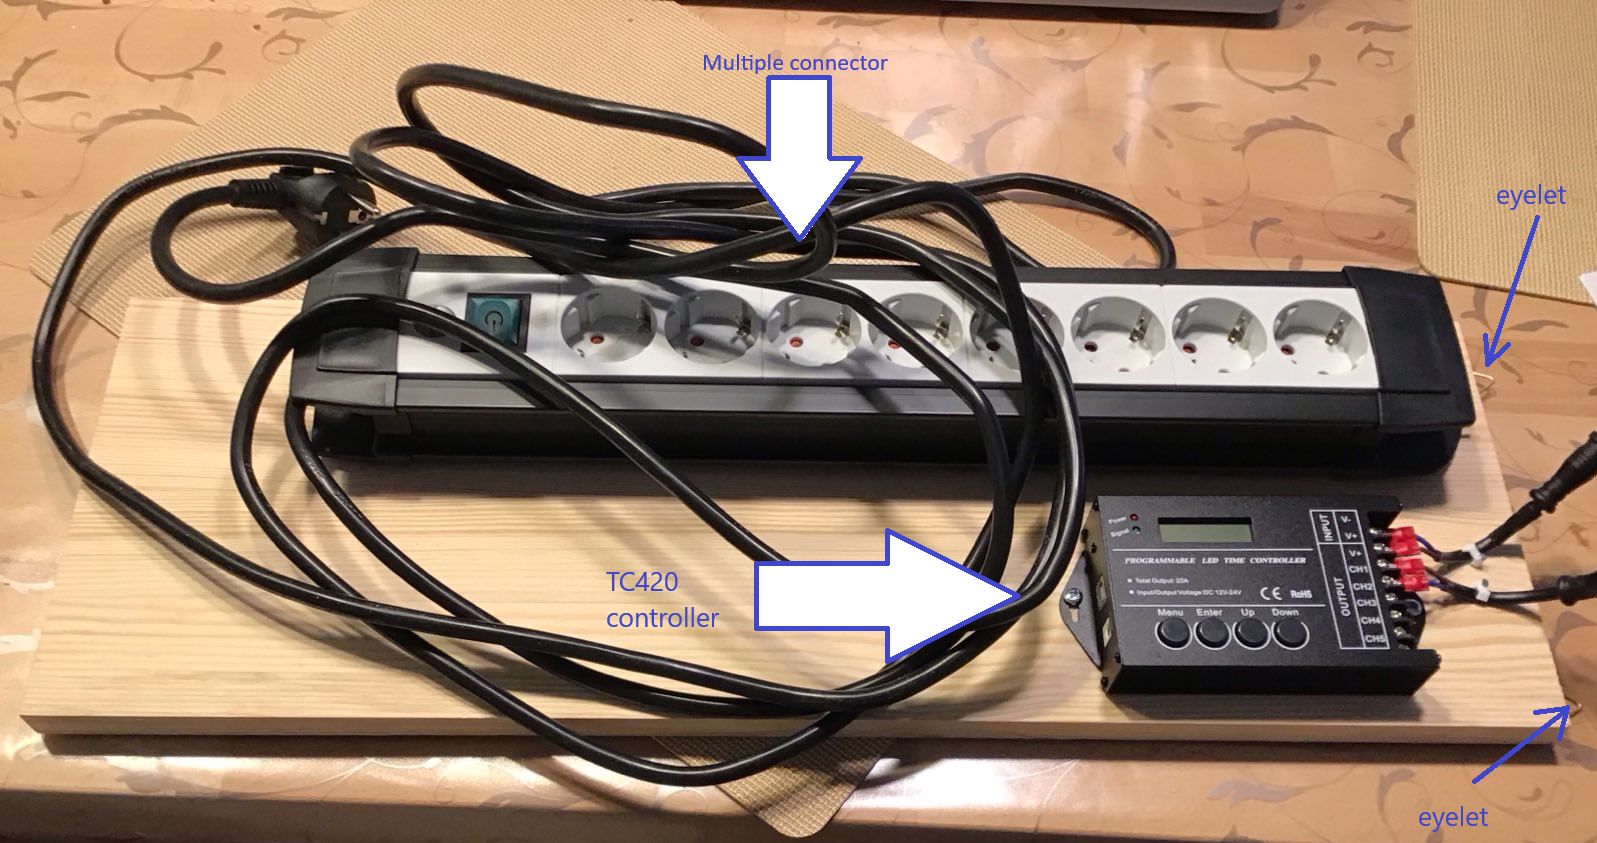
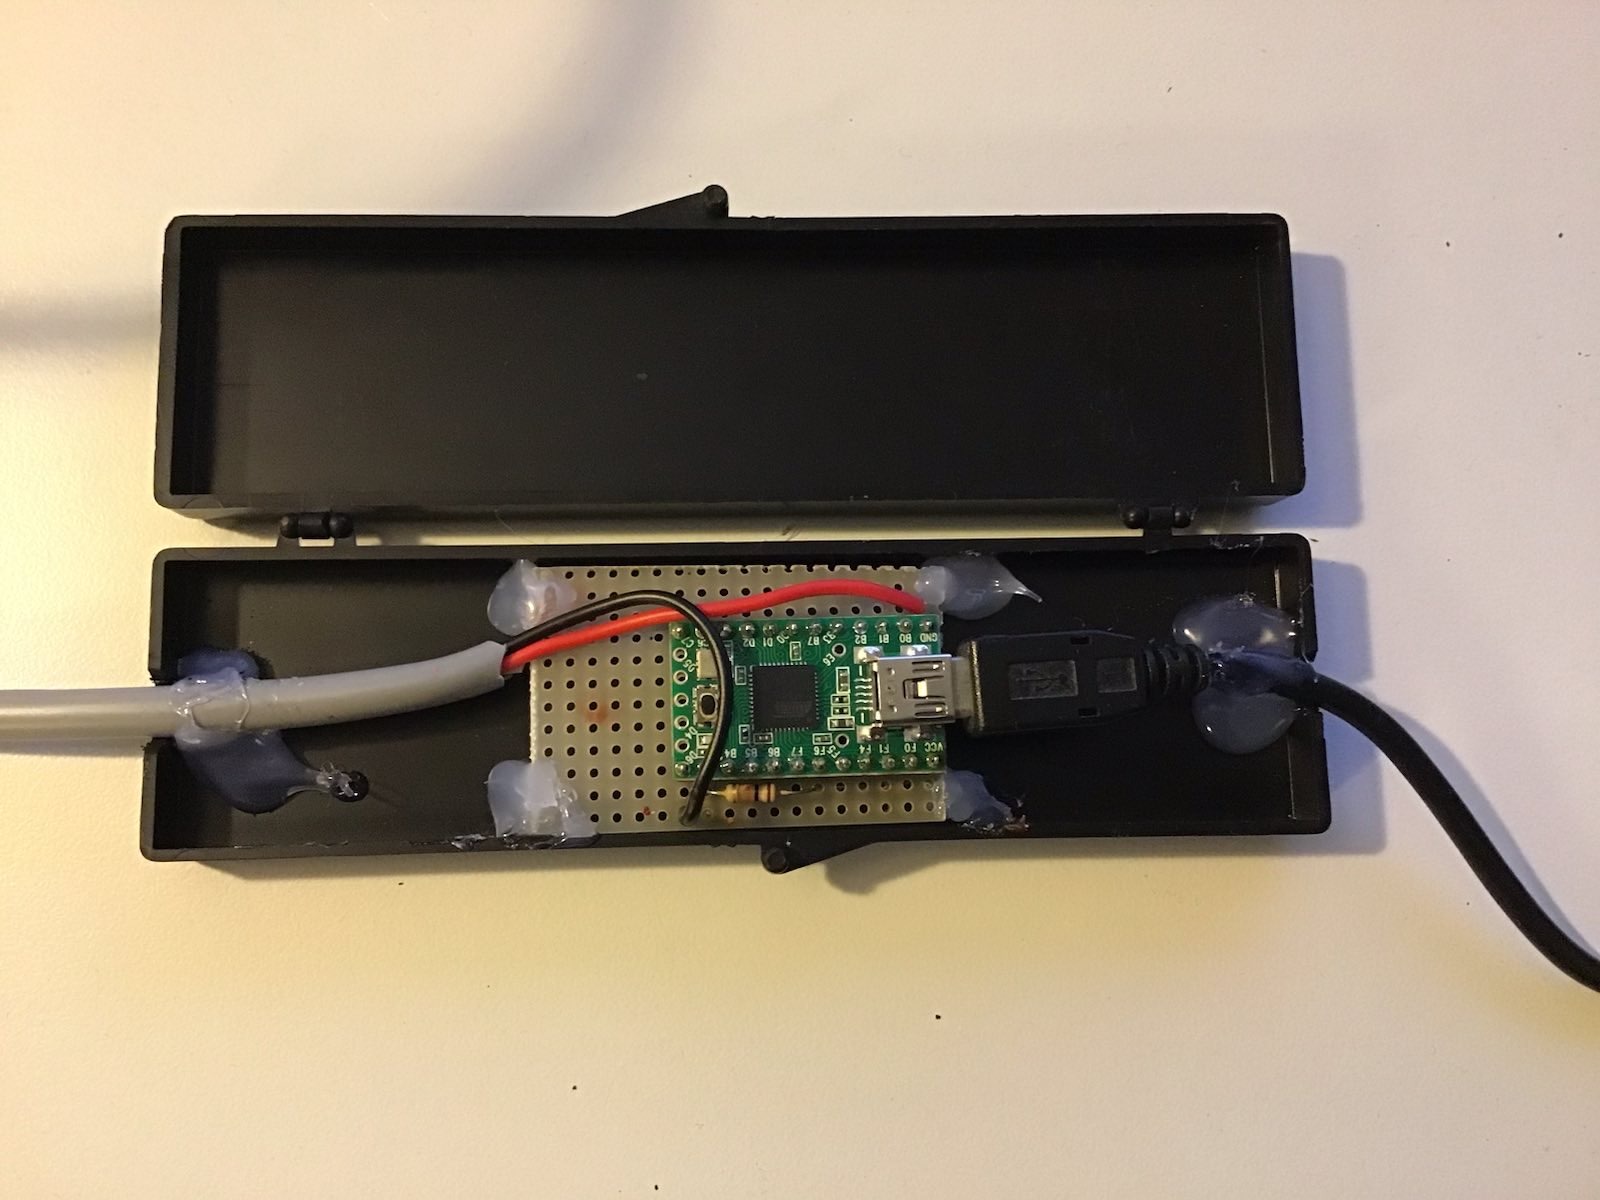
In this image you can already see the two cables that we got from cutting the Y-adapter attached to the controller, but the next two figures are probably more instructive. The first one shows a close-up of the controller with the two cables attached to it. If you look closely, you will notice the piece of heat shrinking tube I wrote about a little bit earlier. Click into the image for a higher resolution image version in a separate browser window.
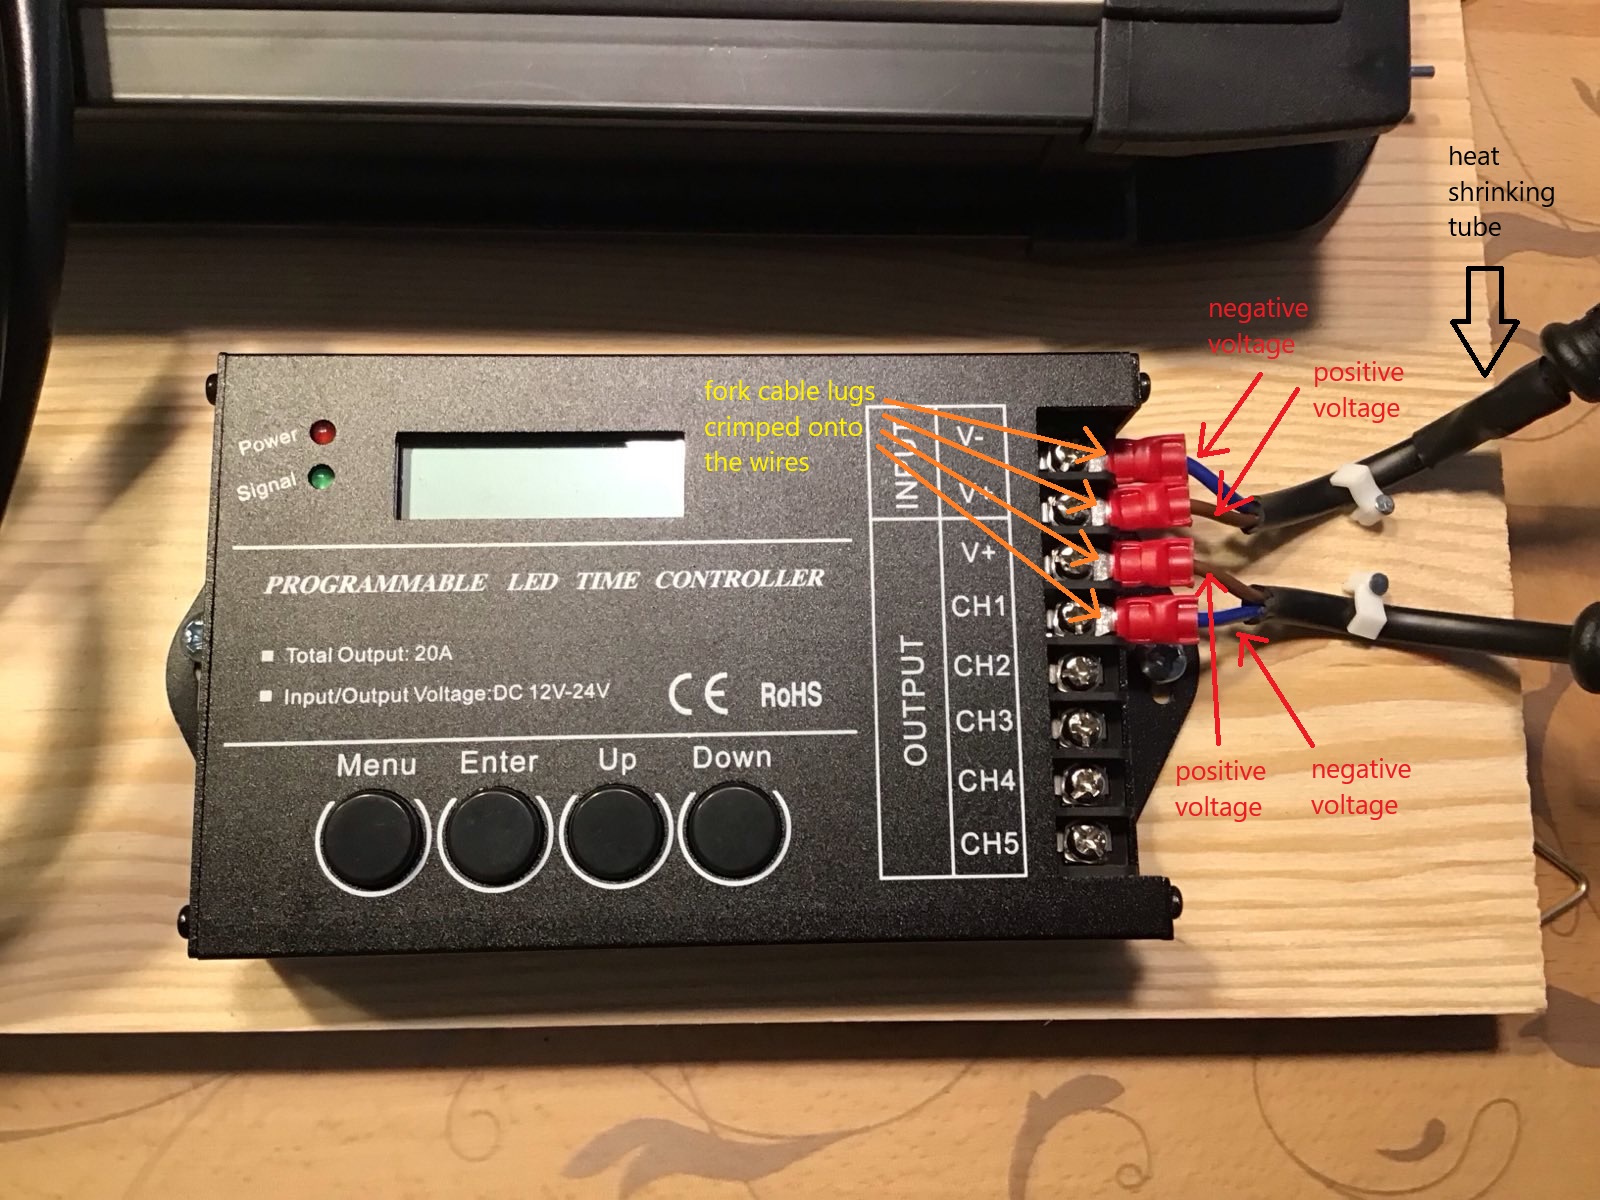
Notice in this image that we are actually using only one channel (channel 1) of the controller. In total this controller can drive up to 5 of these channels. Do note that you should not blindly attach more LED stripes to the controller unless your power supply is powerful enough to drive all of them.
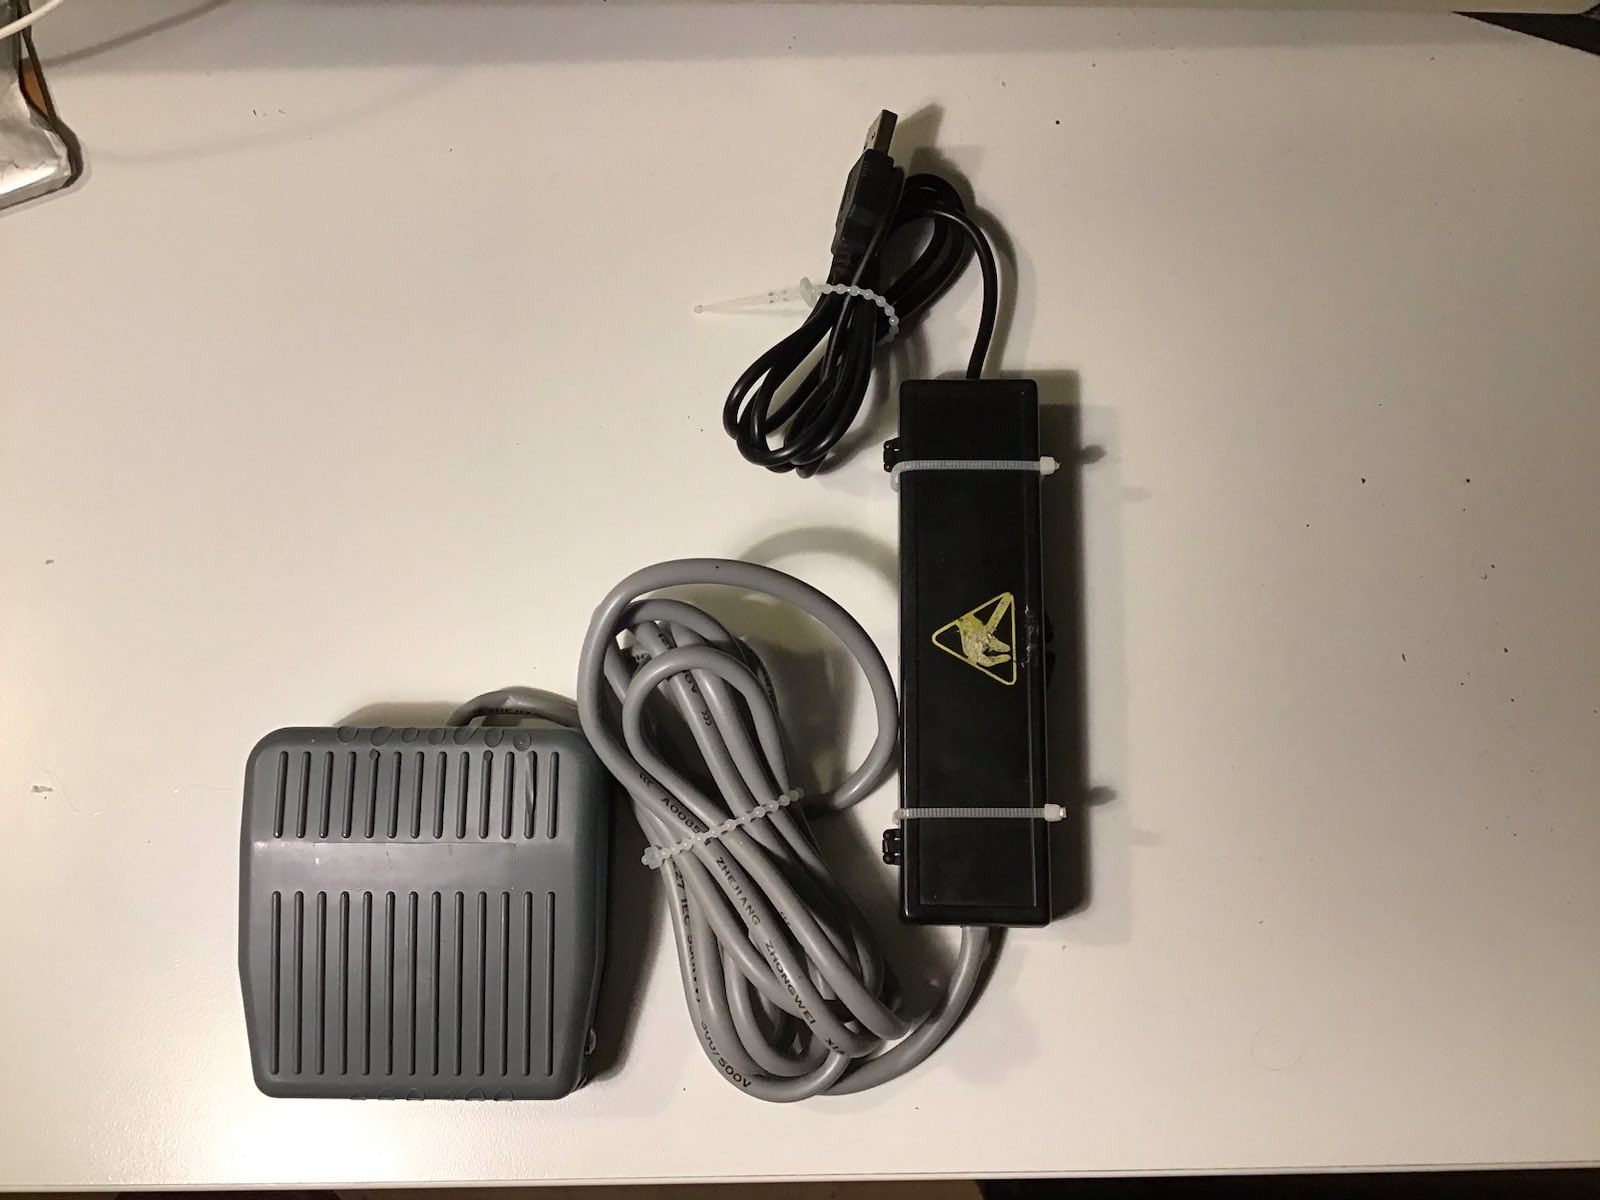
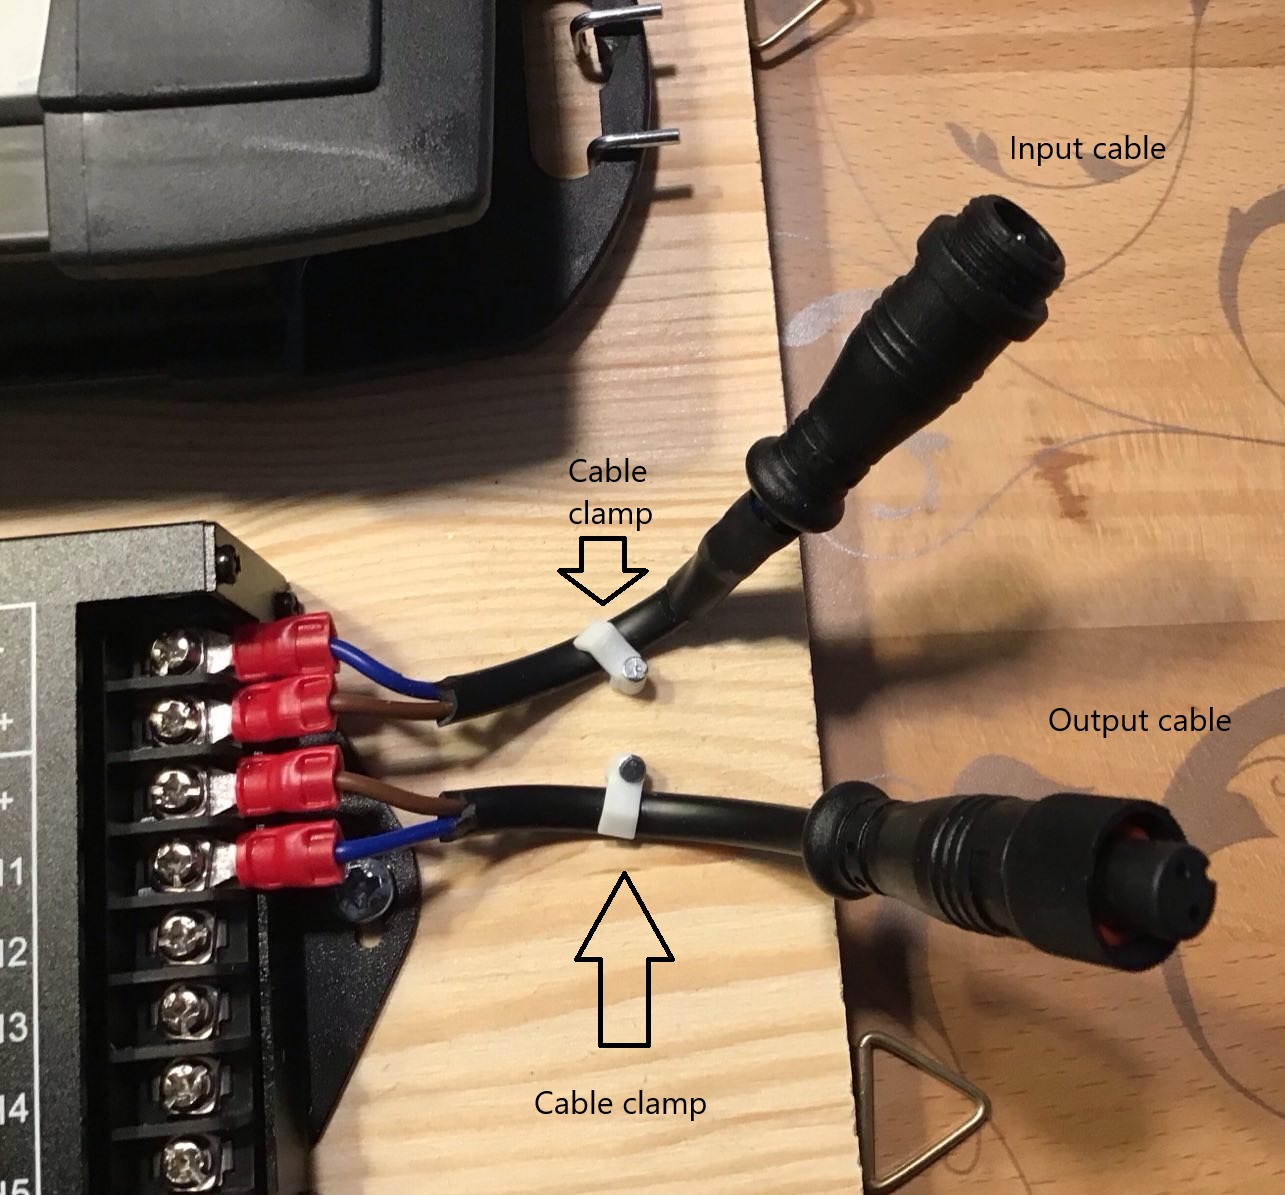
The next figure shows a close-up of the two cables, notice the eyelets at the right which actually will be the upper edge of the board once it is hinged into the floor cupboard of the fishtank. You can also see here the two cable clamps that I mounted onto the board for better strain relief of the input and output cables. Click into the image for a higher resolution image version in a separate browser window.
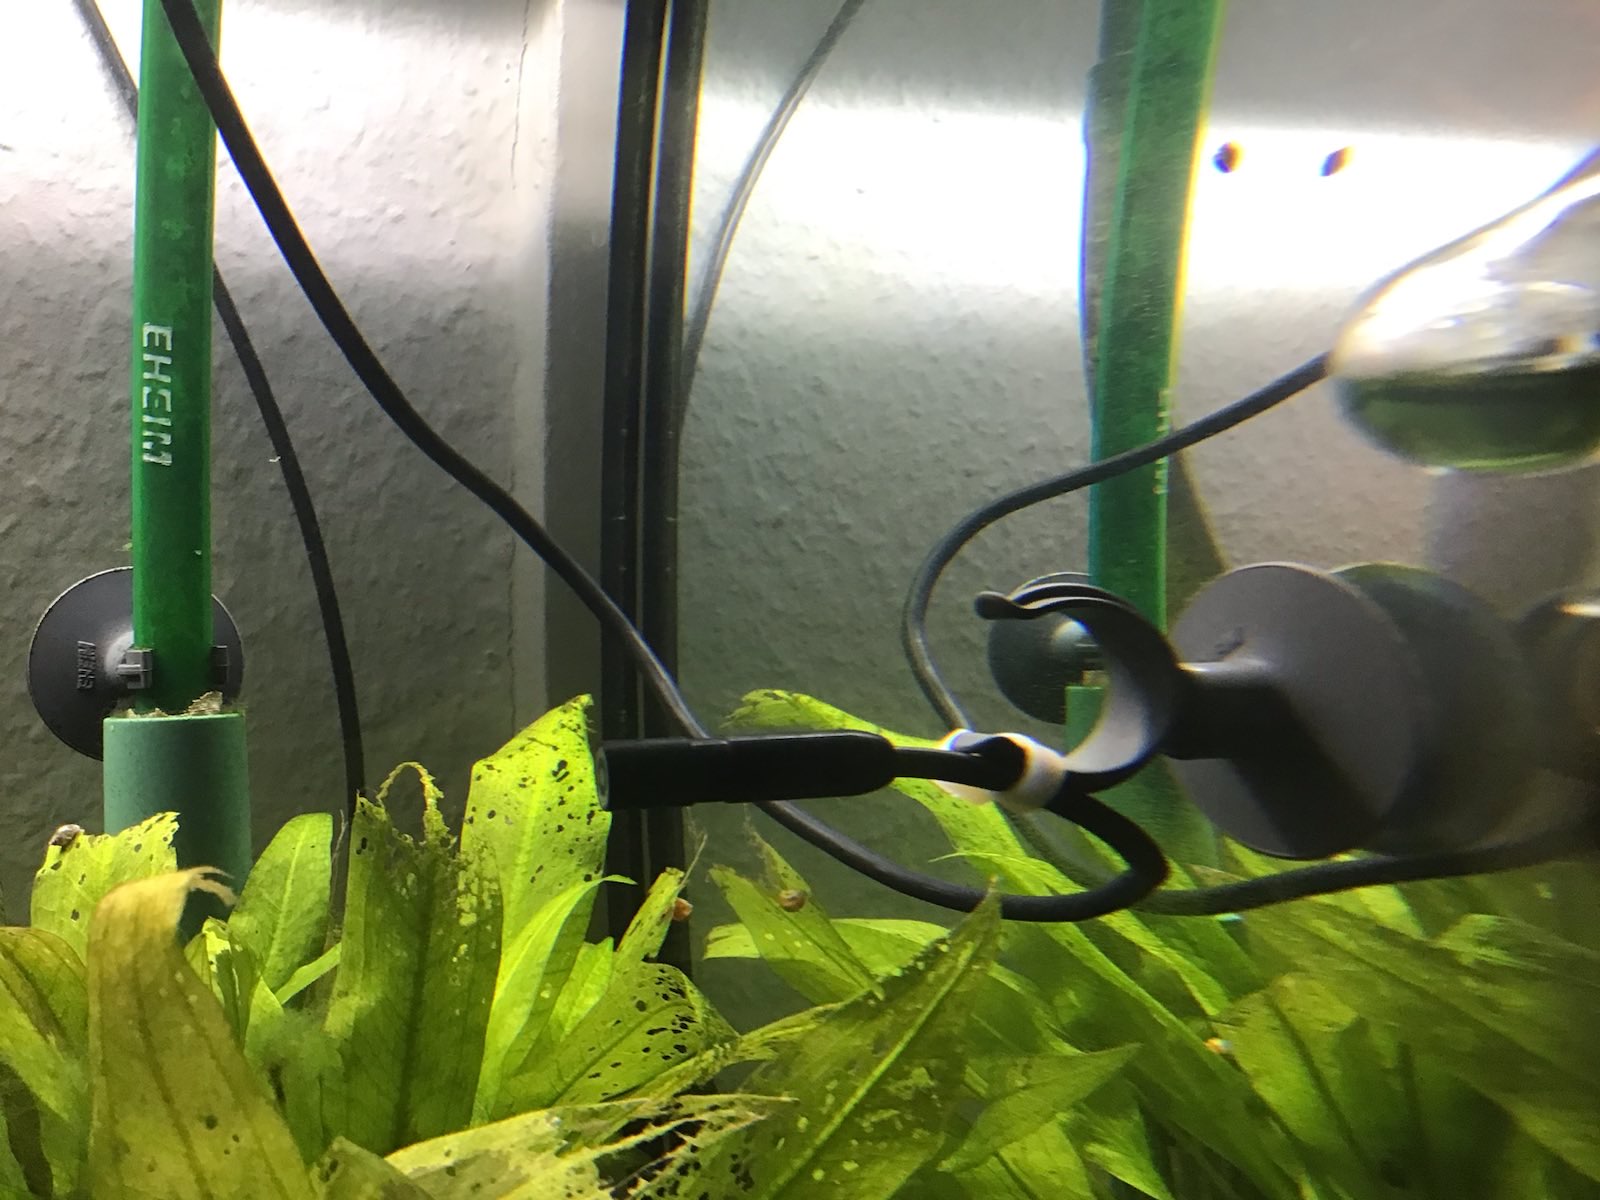
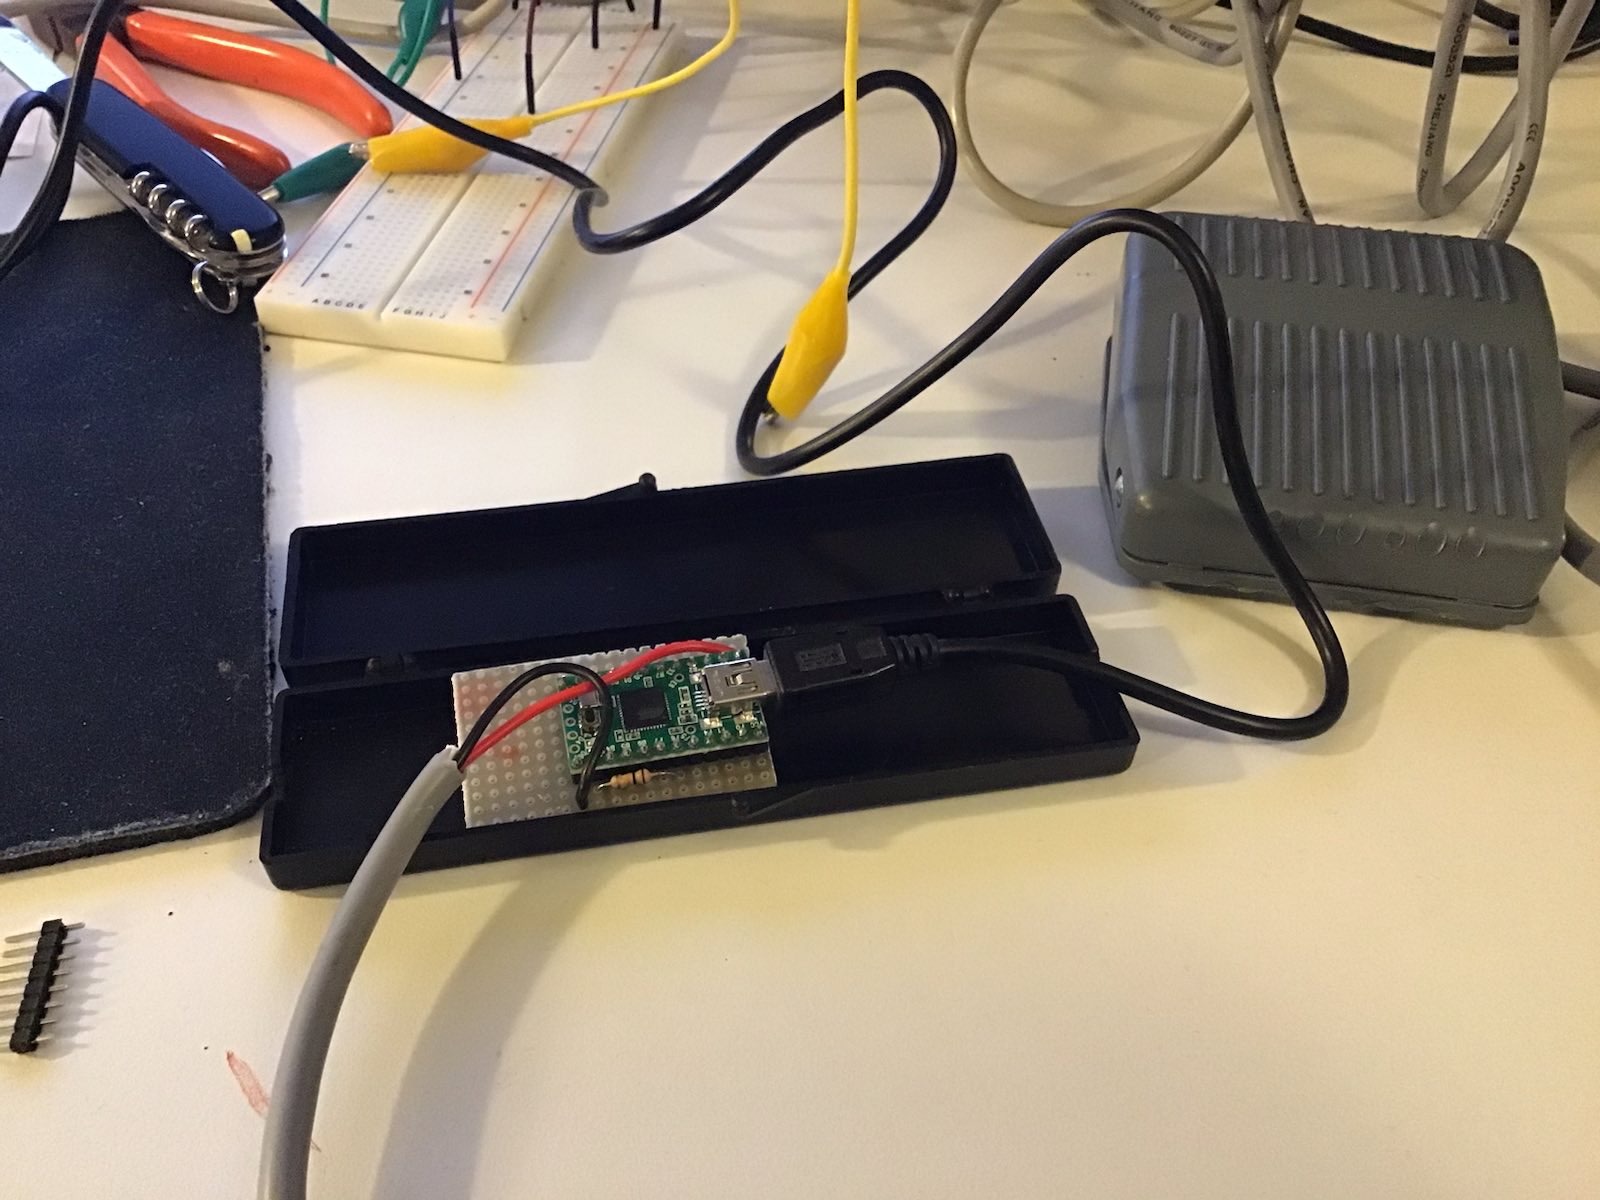
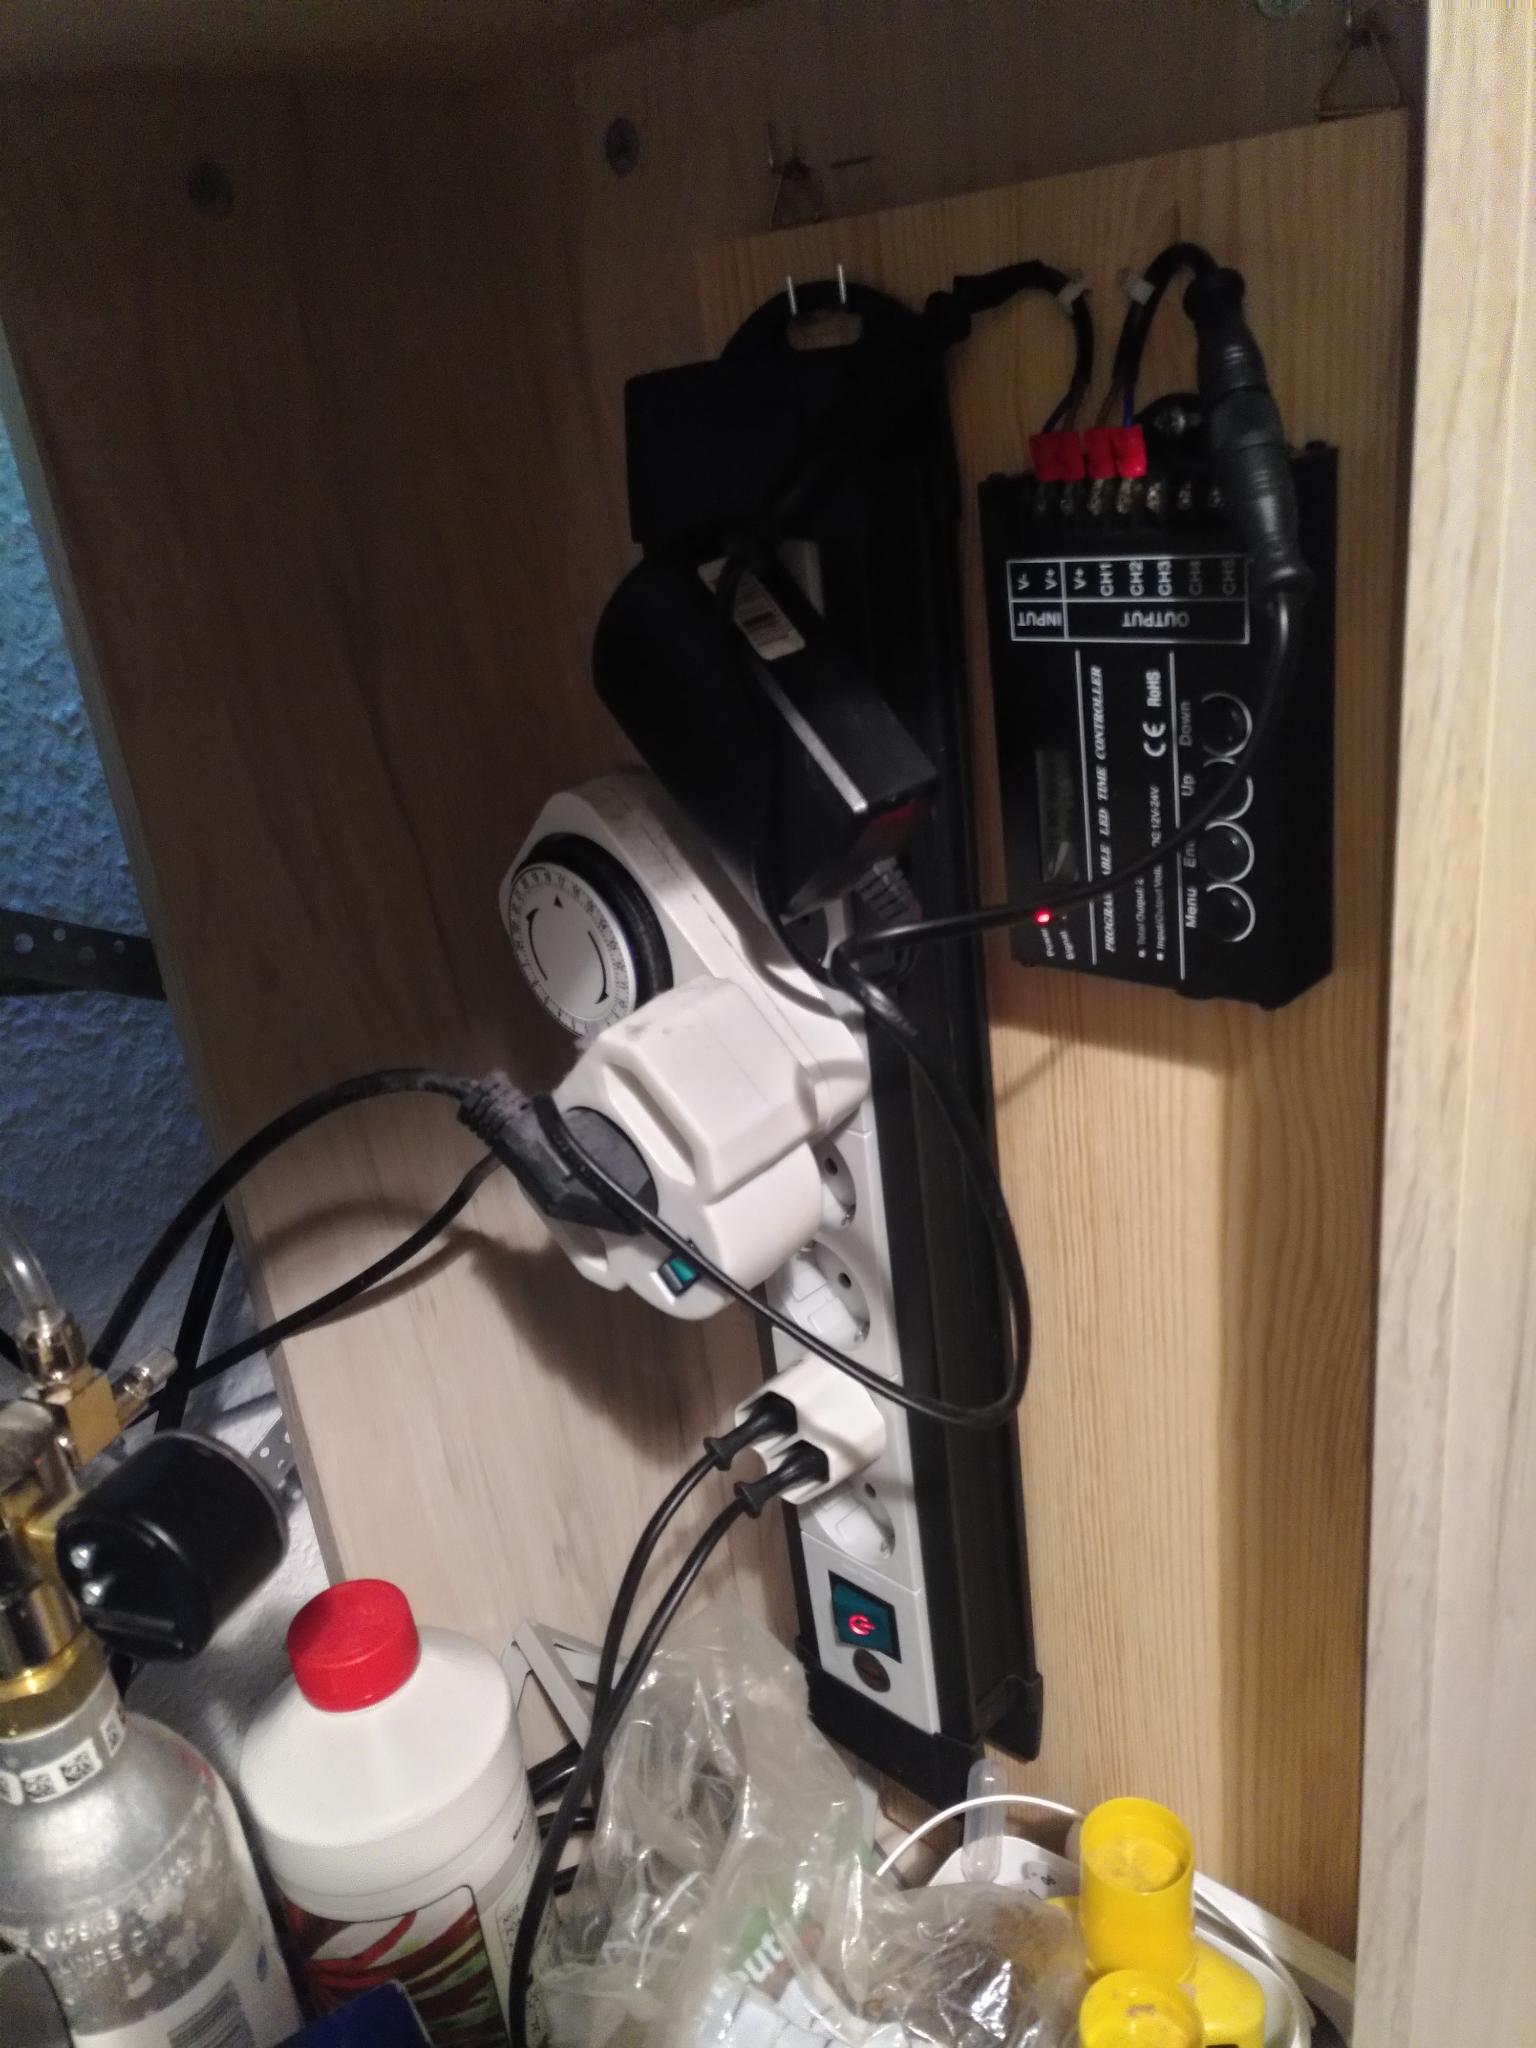
Now all the hardware stuff is prepared and we can hinge the board into the fishtank's floor cupboard and connect the input cable from the previous image with the output cable of the power supply and the output cable with the LED stripe. The result looks as shown in the next image. Click into the image for a higher resolution image version in a separate browser window.
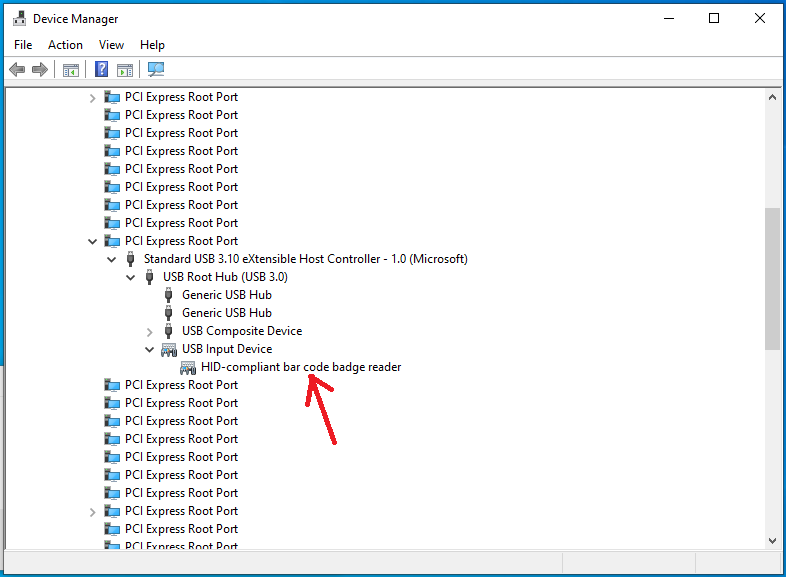
Now that we have finished up all hardware related stuff, it is time to program the whole shebang. For this I used my laptop computer and connected it with the cable that ships with the controller to the TC420. The company, Weller LED, where I purchased the controller offers a program ("TC420 app") that allows for easy programming of all the channels in an intuitive way. You can download this software as an MSI package from this webpage: https://www.tc420.app/. While the software itself is multilingual and automatically runs in an English localized version on my English version of Windows, this webpage seems to be in German only, but you sure will be able to find the downlad page there. Unfortunately, the software is not digitally signed, so you will get a yellow bang warning if you install this on your computer when administrative elevation is required, but it is available for free. You get what you pay for.
After having started this software for the first time (while connected via USB to the TC420) it is probably a good idea to synchronize the time of your computer with the controller. I am pretty sure I will have to repeat this once after each daylight savings change in spring and fall. Time syncing is done via the "Device" - "Sync time" menu item.
The application's user interface shows 5 graphs, one for each channel and every graph represents the light intensity curve of the channel over a 24 h period. You can also switch the display of "modes" here. By default there are two modes: "Normal" and "AlwaysOn". I didn't bother if these are hardcoded names or how many modes I can use with the software or the controller, these two modes are sufficient for me. The next image shows my first attempt of modelling the curve for channel 1 in the mode named "Normal". Click into the image for a higher resolution image version in a separate browser window.

The idea of this curve was to have zero brightness until 7 AM with a linear increase of brightness until 10 AM when 100% brightness is reached. At 4 PM the brightness should decrease in a linear manner until 6 PM when zero brightness is reached. After having modeled a curve, it is a good idea to save it to a file (which is actually a plain vanilla XML file) and then to upload it to the TC420 via the "Device" - "Upload program" menu item. After the upload of the "program" to the TC420, you have to start it using the buttons on the TC420. There is a German pdf manual here, that shows how to do this. Basically you have to use the 4 buttons to select a mode (either "Normal" or "AlwaysOn") and run it. An English equivalent of this manual can be found on the CD that accompanies the TC420 package, albeit in pidgin English. On the CD you can also find a Windows program that allows you to do the same as with the TC420 app from Weller, but that software really looks clumsy in comparison with the TC420 app.
Alas, the result of my first brightness curve as above was not really very pleasing. I did not attach the multimeter to measure increase and decrease of current or voltage over time, but I assume that the curve modelled here simply increases or decreases the electrical current in a linear fashion which is probably not exactly linear with the brightness perceived by the human eye (is there anything like "linear human perception" at all?). For instance in the morning the perceived maximum brightness was already achieved after half an hour at 7:30 AM and in the evening a noticeable decrease in brightness was only perceived in the last 20 minutes before zero brightness would happen. So I modeled another curve that seems to be better suited for the human perception of brightness, this is shown in the next image. Click into the image for a higher resolution image version in a separate browser window.
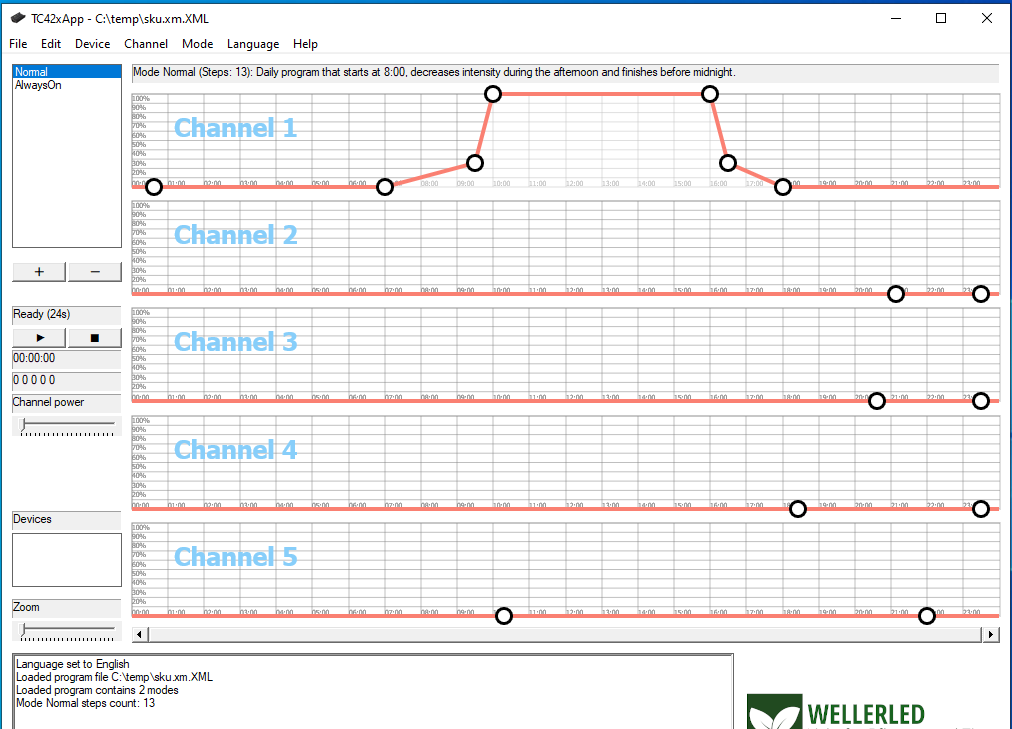
With this curve, the electrical current is zero until 7 AM and increases to 25 % at 9:30 AM in a linear fashion. From then on it is increased within half an hour to 100%. Again, at 4 PM the electrical current rapidly decreases to 25 % at 4:30 PM and then slowly decreases in linear fashion to zero until 6 PM. This looks pleasant for the human eye and I hope for the fishtank inhabitants as well. The other mode named "AlwaysOn" was changed by me to always be zero, despite its name. This is so I can easily see during the day which program is running on the TC420: if the lighting system is off, the "AlwaysOn" mode is running inadvertently and if there is some brightness, it must be the mode named "Normal" that is running. One additional point of interest I didn't mention so far is the demo mode of the TC420 App. Using this mode (menu item "Device" - "Play demo") you can do a time-lapse simulation of the brightness schedule of your graph directly with your LED stripes while your computer is connected via USB to the TC420.
]]>